How to Make Trap Beats A Producer’s Guide to FL Studio
If you want to make a legit trap beat, you need to nail four things: a tempo somewhere between 130-160 BPM, drums that hit hard with those signature fast hi-hats, a booming 808 bassline, and a simple, dark melody. Get these pieces right in FL Studio, and you’re already on your way to a track that sounds like it belongs on a playlist.
Setting the Stage for Your Trap Beat
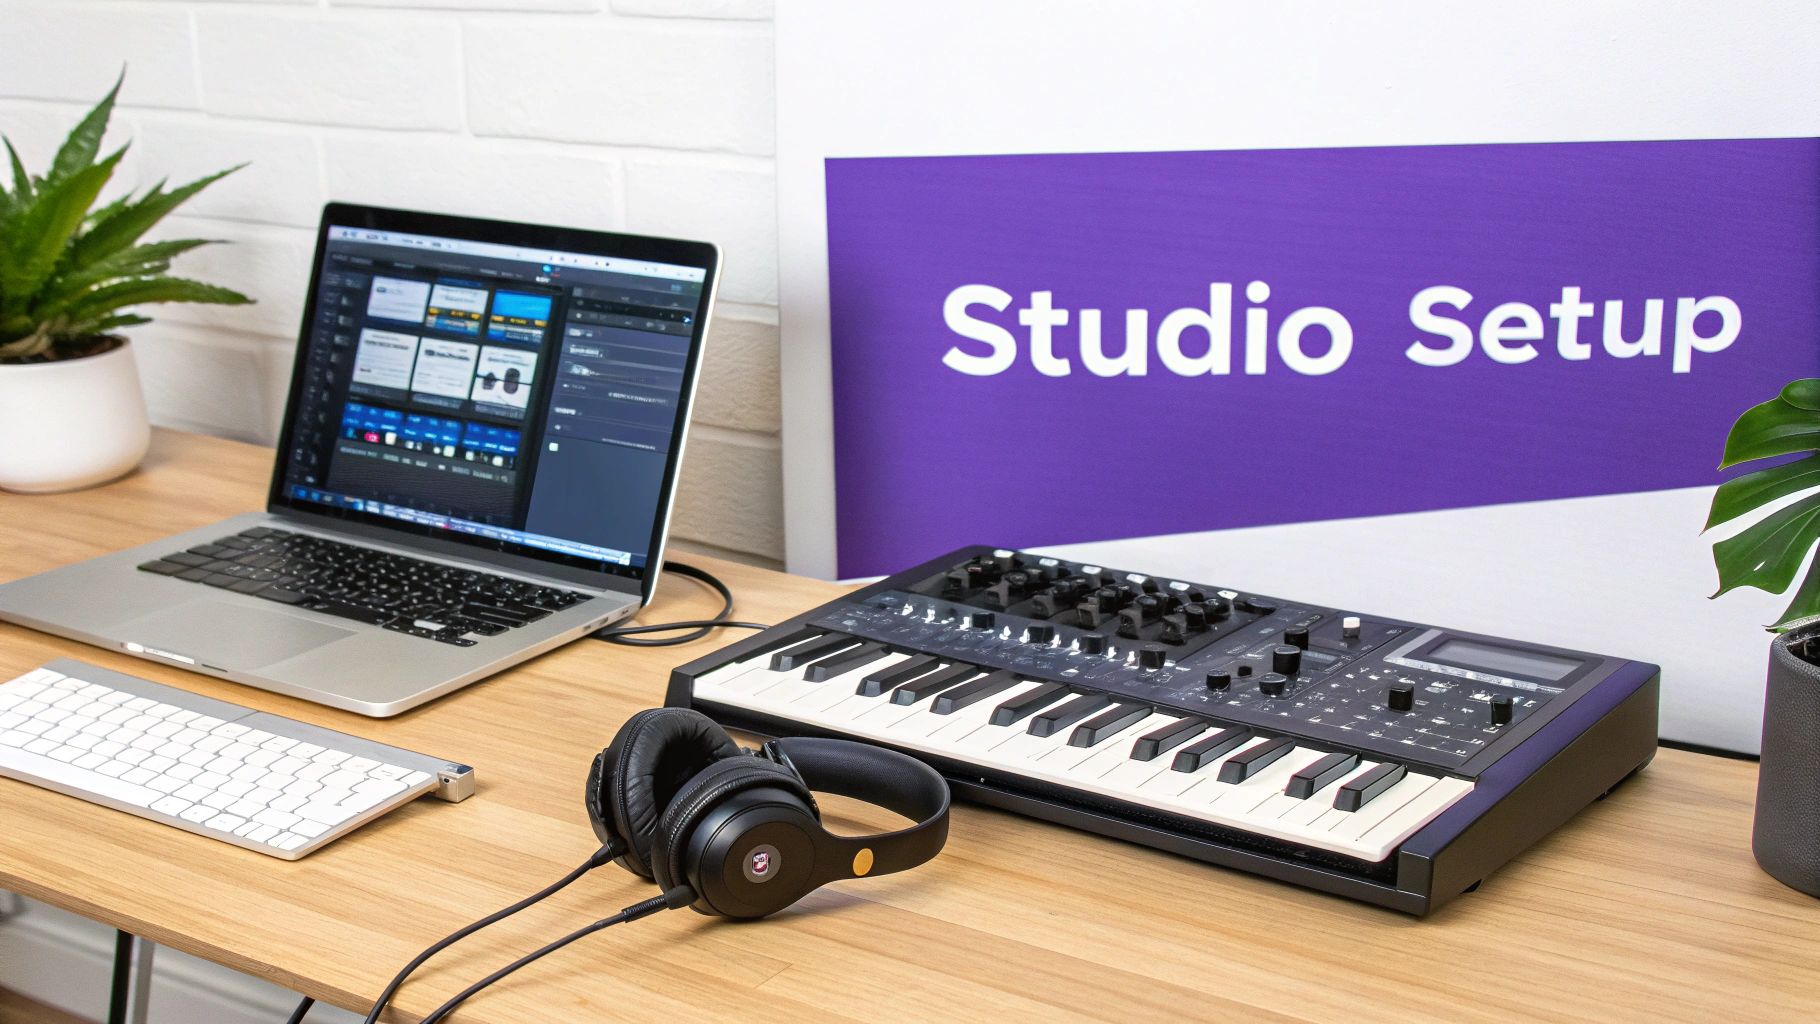
Before you even drag a single sound into your project, you’ve got to get the foundation right. How you set up your session in FL Studio is everything—it dictates the entire feel and groove of your track from the jump.
This all starts with the tempo. For pretty much all trap music, you’ll be living in the 130 to 160 BPM range. This gives you that high-energy pulse that defines the genre, but it’s also slow enough to give your beat that laid-back, half-time feel. For example, a track at 145 BPM lets the hi-hats fly but gives the snare and 808 plenty of room to breathe and hit heavy.
To get started on the right foot, here’s a quick cheat sheet for setting up your project.
Essential Trap Beat Starting Points in FL Studio
| Element | Recommended Setting | Why It Matters |
|---|---|---|
| Tempo | 130–160 BPM | Creates the classic high-energy yet relaxed trap groove. |
| Swing | 15–25% (Global) | Adds a natural, human bounce and prevents a robotic feel. |
| Metronome | Set to 2-step | Helps program fast hi-hat rolls and syncopated patterns easily. |
| Grid Snap | 1/2 or 1/4 Step | Keeps your main drum elements locked in tight to the beat. |
Following these simple starting points will save you a lot of headaches later and ensure your beat has that authentic trap feel right from the beginning.
Finding the Right Bounce
Once your tempo is set, it’s time to add some swing. This is what separates a stiff, robotic beat from one that has a real human groove. In FL Studio, your best friend for this is the main ‘Swing’ knob right on the top toolbar.
You don’t need much—a little tweak between 15-25% is usually all it takes to push your percussion just slightly off the grid. You can even apply swing to individual sounds using the ‘Shift’ knob in the Channel Rack. This is perfect for nudging just your hi-hats or a shaker to create that subtle bounce that’s all over modern trap.
The real magic of trap isn’t just speed; it’s the contrast between fast, skittering hi-hats and a slow, powerful backbeat. Mastering this push-and-pull is essential for creating an authentic groove.
Building Your Sound Palette
The sounds you pick are just as critical as the patterns you write. Don’t just grab the first kick and snare you see. Take a minute to actually build a cohesive sound palette that matches the vibe you’re going for. Are you making something dark and gritty like a 21 Savage track, or is it more melodic and bright?
Start by finding a solid, royalty-free drum kit. Your core sounds should always include:
- A punchy kick: You want something with a sharp attack and a short tail.
- A crisp snare or clap: This is your backbeat, so it has to cut through everything else.
- Sharp hi-hats: Grab both closed and open samples. You’ll need them for rhythmic variation.
- A deep 808: This is the heart of your low end. Look for one with a clean, powerful sub.
Trap music first blew up in the mid-2000s, with producers like Lex Luger setting the standard. Now, it’s a cornerstone of a global hip-hop industry that generated over $25 billion by 2020. That signature sound is built on those rumbling 808s, usually tuned between 30-60 Hz, and those rapid-fire hi-hats, which can make up over 60% of the drum patterns in today’s hits. You can learn more about the genre’s massive impact from these hip hop statistics.
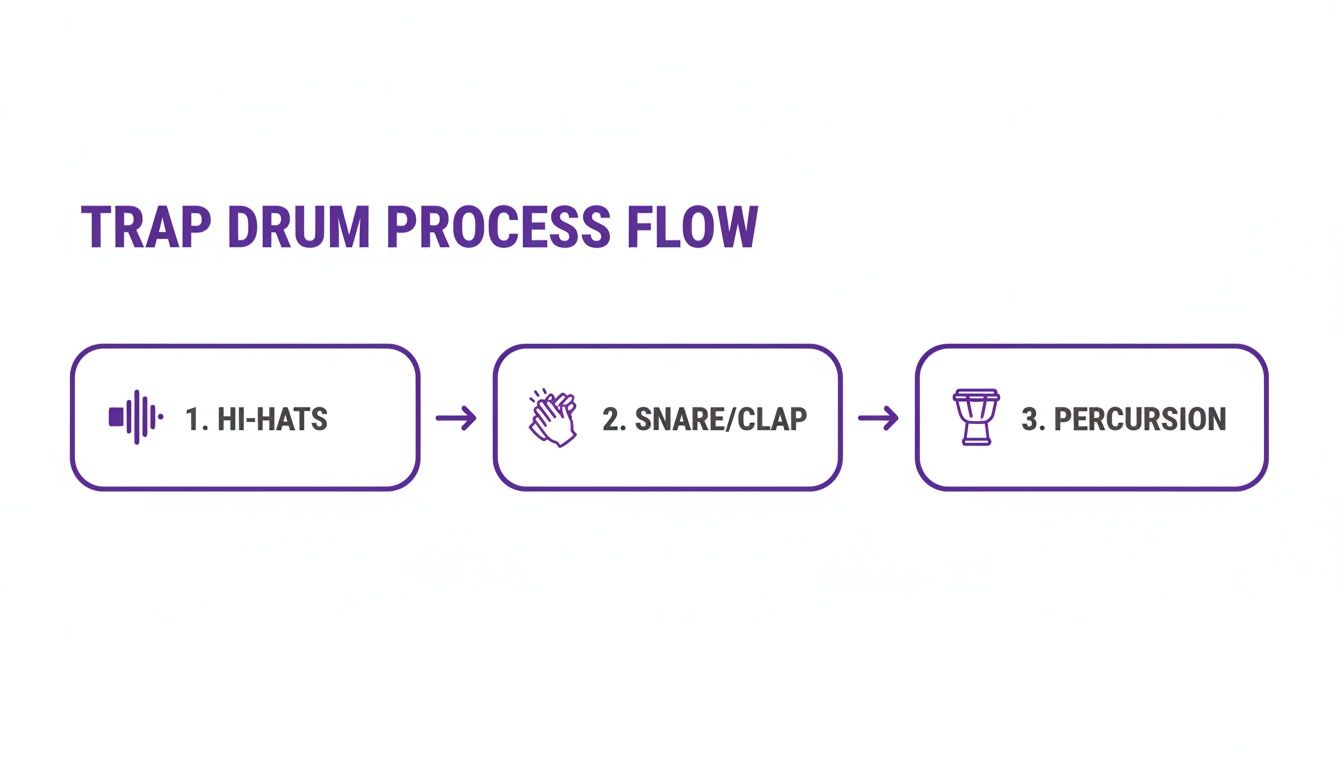
Building Drums That Hit Hard
Alright, you’ve got your sounds picked out. Now it’s time to build the engine of your trap beat: the drums. A weak drum pattern will absolutely kill your track’s vibe before it even has a chance. We’re aiming for a rhythm that’s not just heavy, but hypnotic and full of that subtle bounce that gets heads nodding.
This is more than just dragging kicks and snares onto a grid. It’s about crafting a dynamic foundation that feels alive. We’ll kick things off with the most iconic element of any trap drum pattern—the hi-hats.
Crafting Complex Hi-Hat Rolls
The secret to those signature, skittering hi-hats is all in FL Studio’s Piano Roll. For a moment, forget the Step Sequencer. Right-click your hi-hat sample in the Channel Rack and hit “Piano roll.” This is where the real magic happens.
Start simple by laying down a basic two-step pattern, placing a note on every 1/8th note. This is your foundation.
Now, let’s inject some life into it with rolls and fills. A classic move is to drop in faster rolls at the end of a two or four-bar phrase. To get this done, change your grid snap to something tighter, like 1/32 or even 1/64, and draw in a quick burst of notes. This creates that stutter effect that practically defines modern trap.
Pro Tip: Don’t just copy and paste the same roll over and over. Make your rolls feel more human by playing with the note velocities. A roll that fades in or out by adjusting the velocity of each note adds a layer of professionalism that really stands out.
Another killer tool in the Piano Roll is the note slide. By placing a slide note right after a regular one, you can create cool pitch bends that give your hi-hats an almost melodic feel. Try experimenting with short, sharp slides to add some unique texture to your rhythm.
Layering Snares and Claps for Punch
A single snare sample often sounds thin and weak on its own. To get that powerful, cracking sound that slices through a busy mix, layering is absolutely essential. The go-to combo in trap is a sharp clap layered on top of a punchy snare.
Here’s how to pull it off like a pro:
- Find Complementary Sounds: Grab a clap with a really sharp transient (that initial snap) and pair it with a snare that has a nice, full body or tail.
- EQ Each Layer: Use an EQ to carve out space so they aren’t fighting each other. For example, cut some of the low-end mud from the clap to let the snare’s body shine through, and maybe give the clap a little boost in the highs for extra crispness.
- Adjust the Timing: Try nudging the clap just a few milliseconds ahead of the snare. This creates a subtle “flam” effect that makes the combined hit sound way bigger and wider.
This one technique will instantly upgrade your backbeat from a simple “thwack” to a powerful, textured impact that holds down your entire groove. If you’re looking to expand your sonic arsenal for layering, you can find a ton of amazing, royalty-free options in dedicated hip-hop drum sound packs, which often come with pre-processed, mix-ready samples.
In the streaming world, where trap beats are king, this kind of detail matters. With hip-hop pulling in over 118 billion views on TikTok back in 2020, you need hard-hitting drums to grab a listener’s attention fast. The top trap hits regularly rack up 200-300 million Spotify streams, and it’s that infectious rhythm that gets them there. Since 78% of streams happen on mobile, make sure your drums pop on small speakers. For extra rhythmic flair, try throwing Gross Beat on your snare fills for some half-time stutters—it’s a classic FL Studio trick for a reason. Learn more about the huge growth in music streaming revenue and what it means for producers.
Adding Groove with Percussion
Once your hi-hats, snares, and claps are locked in, it’s time to add percussion to fill out the rhythm. This is how you add subtle complexity and movement to keep the beat from sounding boring and repetitive.
- Open Hats: Drop these on the off-beats to create bounce and syncopation. Placing one on the “&” of the second and fourth beats is a classic starting point.
- Rimshots and Shakers: Use these sparingly just to add some texture. A simple shaker pattern panned a little to one side can instantly create a wider stereo image and a feeling of constant motion.
- Ghost Notes: These are just super quiet snare or rimshot hits you sprinkle in between the main backbeats. They add a funky, subtle groove that listeners will feel more than they actually hear.
The main rule here is to not overdo it. Every percussive sound should have its own space and serve a purpose. Think of it like a conversation between your drum sounds—you don’t want them all talking at once.
Mastering Your 808 Basslines
Let’s be real: the 808 is the heart and soul of any trap beat. It’s not just a bassline—it’s the raw power, the weight, and the emotional gut-punch of the entire track. If you’re serious about making trap beats that actually slap, getting your 808 to sit perfectly in the mix is a skill you absolutely have to master.
It all starts with picking the right sound. The 808 sample you choose literally sets the entire vibe. Are you going for a clean, deep sub that rumbles under everything else, or do you need a gritty, distorted 808 that slices through the mix with pure aggression? There’s no wrong answer, but they serve completely different purposes.
Think about the other elements in your beat. If you’ve got a busy, complex melody, a cleaner 808 that stays in its lane might be the move. On the other hand, a more minimalist track can be carried entirely by a saturated, character-rich 808. For a massive arsenal of both clean and distorted tones, you can find pro-quality samples in curated Trap Star sound packs to get you started fast.
Tuning Is Not Optional
After you’ve found the perfect sample, the single most critical step is tuning it. Seriously. An out-of-tune 808 will make your whole track sound amateur and dissonant, no matter how fire the rest of it is.
Here’s a quick way to nail it in FL Studio:
- Load your 808 into a Sampler channel.
- Find the root note of your melody in the Piano Roll (let’s say it’s C).
- Draw that C note in the Piano Roll to trigger your 808.
- Slap a tuner plugin like Fruity Tuner on the 808’s mixer track.
- If the tuner shows it’s sharp or flat, jump back to the Sampler window and tweak the Pitch knob until it’s dead on.
It’s a tiny step that makes a world of difference, guaranteeing your bass locks in harmonically with your melodies.
Creating Those Signature Glides and Slides
That iconic sliding 808 sound you hear everywhere? It all happens in the Piano Roll. This is where you inject personality and movement into your bassline, turning a simple pattern into something people can’t get out of their heads.
To pull off an 808 glide in FL Studio, lay down your main bass note. Then, add a shorter slide note either above or below it, making sure it overlaps just a tiny bit with the main note. The DAW takes care of the rest, smoothly bending the pitch between the two. Play around with long, slow glides to build tension or short, punchy slides to add some bounce.
Pro Tip: Don’t just slide between random notes. Stick to the notes within your track’s musical scale. This keeps your glides sounding melodic and intentional, not like a chaotic mess.
Processing Your 808 for Maximum Impact
A raw 808 sample almost never sounds finished right out of the box. A little processing is key to making it punch through, especially on smaller speakers like phones and laptops that can’t reproduce those deep sub frequencies.
Saturation is your best friend here. It adds harmonic overtones to the bass, making it audible even on devices that lack a subwoofer. You don’t need to go crazy—even a subtle touch can add warmth and presence without it sounding like a distorted mess.
Another non-negotiable technique is sidechain compression. When your kick and 808 hit at the same time, their low-end frequencies fight for space, creating a muddy, undefined sound. To fix this, you sidechain the 808 to the kick. This tells the 808 to duck in volume for just a millisecond whenever the kick hits, carving out space for that initial punch. The result is a clean, hard-hitting low end where both elements have room to breathe and shine.
Creating Melodies That Hook Listeners
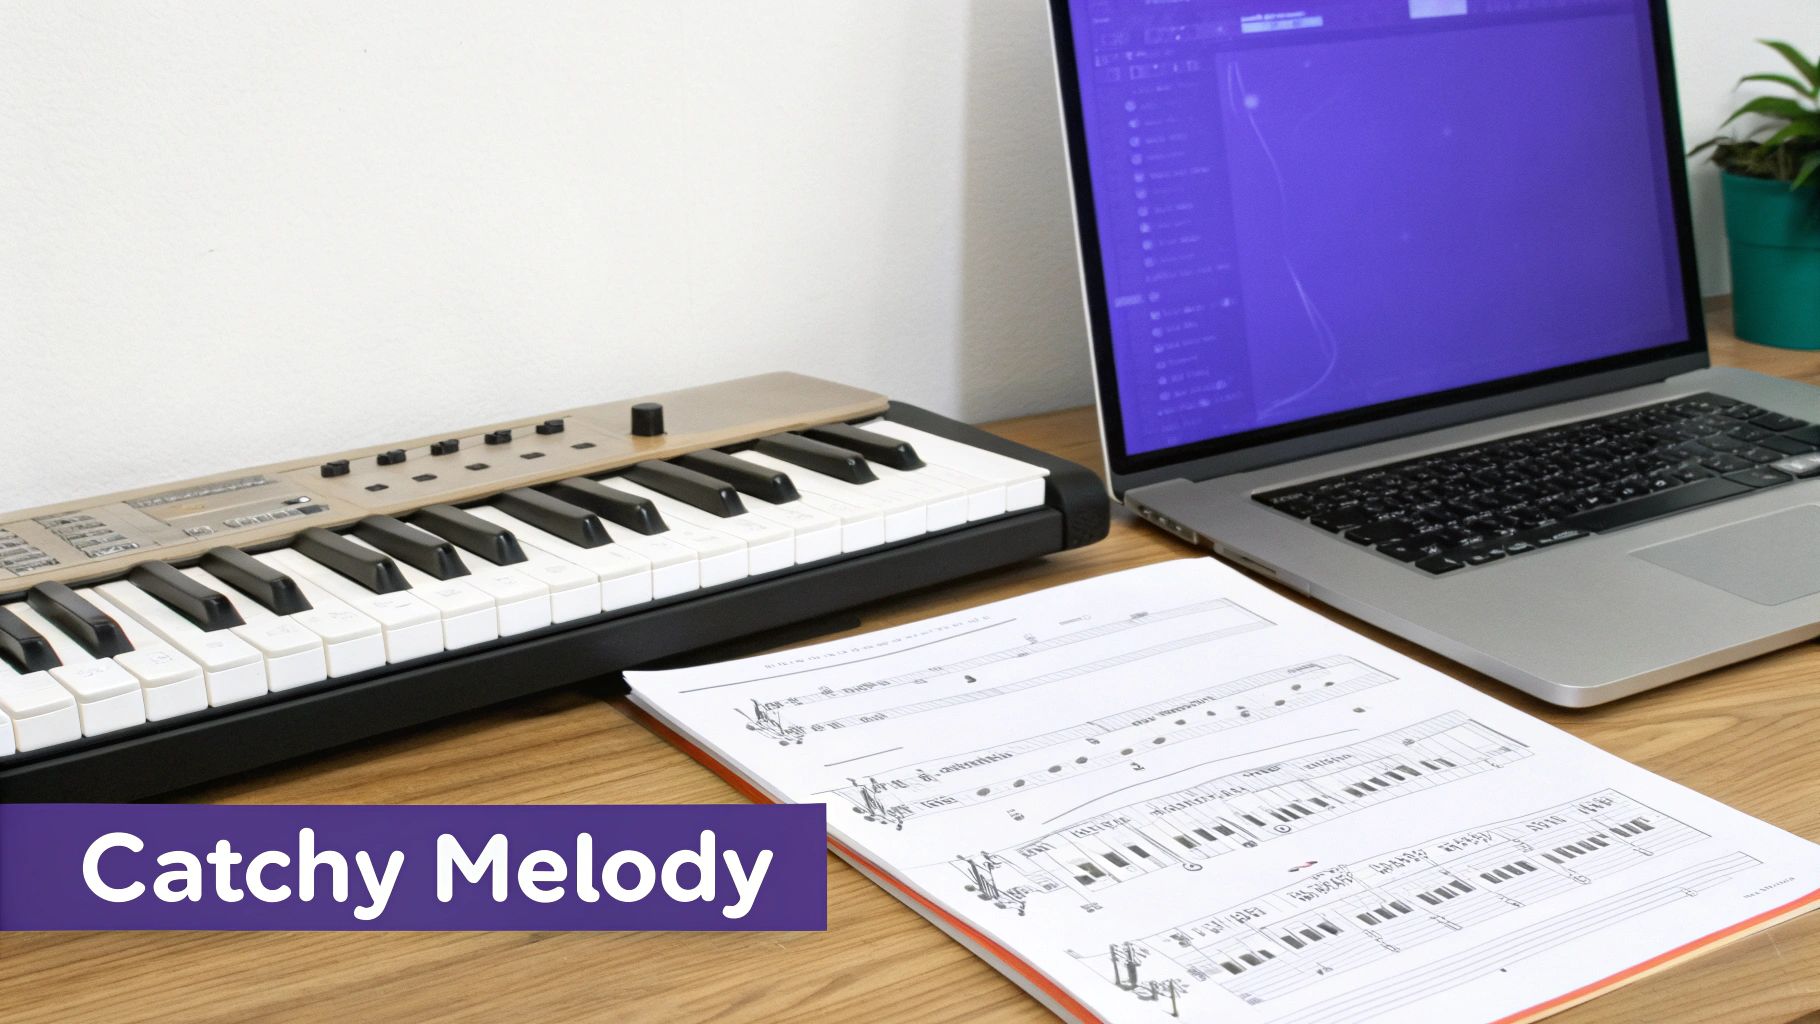
Your drums provide the bounce and the 808 delivers the gut punch, but the melody is what gives your trap beat its soul. It’s the part that gets stuck in someone’s head long after the track ends, carrying all the emotional weight and making your beat genuinely memorable.
A lot of producers, especially when they’re starting out, make their melodies way too complicated. They try to fill every single gap with complex chords and frantic arpeggios. The truth is, the best trap melodies are often incredibly simple—sometimes just three or four notes repeated in a hypnotic loop. The real goal is to create an atmospheric vibe that leaves plenty of room for a vocalist to do their thing.
Let’s break down how to craft those simple but effective melodic hooks, focusing on the sound selection and composition tricks that define the genre.
Choosing Your Melodic Instruments
The instruments you pick will immediately set the mood for your entire track. While there are no hard rules, certain sounds are staples in trap for a good reason—they just work. Think dark, emotional, and atmospheric.
Here are some classic choices to get you started on your melodic layers:
- Pianos: You can never go wrong with a simple, dark piano melody. Playing some minor key chords with a soft touch can create an instant sense of melancholy or tension.
- Synth Pads: These are your best friend for creating a wide, atmospheric background. A sustained pad fills out the mix and adds a cinematic quality without ever getting in the way.
- Plucks and Bells: Short, sharp sounds like plucks or bells are perfect for crafting those simple, repetitive topline melodies that are insanely catchy.
- Synth Leads: A distorted or detuned synth lead can be used here and there for a more aggressive, in-your-face hook when you need it.
And don’t feel like you have to stick to just one sound. Layering a soft pad behind a simple piano melody is a classic trick to add depth and texture, making the whole melodic section feel richer and more complete.
Writing Melodies in the Right Key
To get that signature dark and moody trap vibe, you’ll want to spend most of your time in minor scales. The natural minor scale is the secret sauce behind countless trap hits because its note structure just naturally brings out feelings of sadness, tension, and suspense.
If you don’t know much music theory, don’t sweat it. FL Studio’s Piano Roll has a “helper” tool that makes this ridiculously easy. Just go to the Piano Roll options, select “Helpers,” then “Scale highlighting,” and pick a minor scale (like C minor). This will light up all the “correct” notes on the grid, so you can click in patterns without ever hitting a wrong one.
The goal isn’t to write a complex symphony; it’s to find a simple, repeatable pattern that just feels right. Some of the biggest trap beats are built on melodies that are only two or four bars long. Focus on rhythm and feel over complexity.
Leveraging MIDI to Spark Creativity
So what if you don’t play the keyboard? That’s where MIDI files become a producer’s best friend. A MIDI file isn’t an audio recording; it’s a set of instructions that tells your virtual instrument which notes to play. This gives you total creative freedom.
Imagine finding a professional chord progression or melody in a MIDI pack. You can drag that file right into your FL Studio project and assign it to any instrument you want. Don’t like the piano sound it came with? Swap it out for a gritty synth or an ethereal pad in seconds.
From there, you can jump into the Piano Roll and completely make it your own. Change the timing of the notes, delete a few to create more space, or rearrange the chords to build something entirely new. This workflow is one of the fastest ways to learn how to make trap beats that sound professional, blending expert composition with your unique sound selection.
Arranging Your Loop into a Full Song
So you’ve cooked up a killer 8-bar loop. The drums are hitting just right, the 808 is making the walls shake, and the melody is stuck in your head. That’s a great start, but let’s be real: a loop isn’t a song. If you want artists to actually jump on your beat, you have to turn that fire idea into a full arrangement with a beginning, middle, and end.
Arrangement is all about storytelling. It’s how you grab the listener, take them on a journey, and keep them hooked by building and releasing tension. A flat, repetitive beat is the fastest way to get skipped. A dynamic one, though? That’s how you turn a simple loop into a certified hit.
The Anatomy of a Trap Beat
Most trap songs follow a structure that just works. While there’s always room to get creative, you need to know the rules before you can break them. Understanding this layout is key to making beats that rappers and singers can actually work with.
A typical arrangement usually breaks down like this:
- Intro (4-8 bars): This is all about setting the mood. Keep it simple—maybe just the main melody, some light percussion, or a filter sweep to build some anticipation before the drop.
- Chorus (8 bars): This is the main event. It’s the most energetic and memorable part of your beat where all your best elements come together and shine.
- Verse (12-16 bars): Time to pull things back a bit. The goal here is to create space for the rapper’s vocals. The energy is a little lower than the chorus, but you still need that groove to drive the track forward.
- Bridge (4-8 bars): This part offers a switch-up. You might introduce a new melodic idea or strip the beat down to its bare bones right before slamming back into that final, powerful chorus.
- Outro (4-8 bars): This is where you wind things down. You could fade the beat out, filter the melody away, or just end it all with one last 808 hit.
Once you have your main loop, just clone it a few times and start arranging it in this order. Boom—you’ve got the basic skeleton of a real song.
Building and Releasing Tension
The real art of arrangement is managing the energy of the track. You can’t just have every instrument blasting at full volume for three minutes straight. The secret is to strategically add and subtract elements to create a natural rise and fall.
Think of it this way: your chorus is the absolute peak of energy. The verses should feel like a step down from that, and the intro should feel like a ramp leading up to it.
To nail your verse section, start with your full chorus pattern and just start muting things. Try taking out the main synth lead, silencing the open hats, or simplifying the 808 pattern. This instantly drops the energy and carves out a perfect pocket for an artist to do their thing.
In today’s music game, a strong arrangement is what will make you stand out. A mind-boggling 7.7 million new tracks hit streaming services in 2023, but only a tiny fraction of new artists actually break through. Top producers get ahead because their workflow is efficient. Using arrangement tricks like half-time patterns—where a 140 BPM beat suddenly feels like 70 BPM—is a classic move for creating that essential tension and release. For a closer look at the data behind today’s industry, you can explore the full 2023 year in music report.
Creating Smooth Transitions
Transitions are the glue that holds your song together. They act as signposts for the listener, letting them know a change is coming so the shift from one section to the next feels smooth, not sudden. Without good transitions, your beat will just sound like a bunch of different loops stitched together.
Here are a few go-to tools for seamless transitions:
- Risers and Sweeps: These are sounds that build in pitch or get louder, creating a ton of anticipation right before the chorus drops.
- Drum Fills: A quick snare roll or a tom fill at the end of a 16-bar verse is a classic way to signal that the chorus is about to smack.
- Impacts and Crashes: Drop a reverse cymbal right before a new section starts, then hit a loud crash cymbal right on the downbeat. It adds power and really emphasizes the change.
If you’re looking for ready-made sounds to instantly level up your arrangements, check out professionally designed packs that include trap game loops and transition effects you can just drag and drop into your project. It’s a huge time-saver and can add that professional polish you’re after.
Finally, don’t forget to use automation clips in FL Studio to make your track breathe. Just right-click on any knob—like a filter or a volume fader—and select “Create automation clip.” This lets you draw in changes over time, like slowly filtering your melody during the intro or fading the whole beat out at the end. It’s these small, subtle movements that make your beat feel alive.
Mixing Your Beat for Streaming Platforms
Okay, you’ve laid everything out and arranged your beat into a full track. It’s starting to sound like a real record. Now comes the final—and most crucial—step: the mixdown. This is where you take all your individual sounds and polish them until they shine together, turning a good demo into a professional-sounding track that hits hard on any system, from studio monitors to cheap earbuds.
The whole process starts with the simple stuff: leveling and panning. This is just a fancy way of saying you need to adjust the volume and stereo position (left or right) for every single track. A solid mix is all about balance. A classic pro tip is to pull all your faders down to zero, then bring up your kick and snare first. Get them sitting perfectly together, then slowly build the rest of the mix around that core foundation. Every sound needs its own space to breathe.
Carving Out Space with EQ
Equalization, or EQ, is your secret weapon for creating clarity. Think of it less as a tool to make things sound “better” and more as a way to make everything fit together. The number one cause of a muddy, amateur-sounding mix is when too many instruments are fighting for the same frequencies, especially in that murky low-mid range.
When you’re learning how to make trap beats, the high-pass filter is your best friend. Seriously. Slap one on every track that isn’t your kick or 808 to slice away all the useless low-end rumble you don’t actually need. You’d be shocked at how much bass builds up in hi-hats, synth pads, and even vocal samples.
By cutting the lows from your melodies and pads—start around 100-200 Hz—you instantly carve out a clean pocket for your 808 and kick to punch through without any competition. This one trick alone will make your low end sound tighter and way more powerful.
Adding Punch with Compression
Next up is compression. All compression does is control dynamics, which is the difference between the loudest and quietest parts of a sound. In trap, we use it to make our drums smack harder and feel more consistent. For example, if you put a compressor on your snare, you can clamp down on that sharp initial crack (the transient) and then boost the body of the sound, making it feel fatter and more aggressive.
Just don’t go crazy with it. A little bit of compression goes a very long way. Try to aim for just a few decibels of gain reduction on your drum tracks. You want to add punch, not squash the life out of them.
Mastering for Loudness
Finally, it’s time for a touch of mastering. The only goal here is to get the overall volume of your track up to a competitive level for streaming platforms like Spotify and Apple Music without making it distort.
For a quick and effective mastering chain, all you really need is a limiter on your master channel. A limiter is basically an ultra-aggressive compressor that acts as a brick wall, making sure your signal never, ever goes past 0 dB and starts clipping.
Here’s a simple way to do it in FL Studio:
- Put a limiter (like Fruity Limiter) as the very last plugin on your master track.
- Slowly start turning up the gain knob. You’ll hear the whole track get louder.
- Listen closely. You want it to be loud and full, but you need to stop right before you hear any nasty distortion or weird “pumping” artifacts.
This final touch makes sure your beat can stand tall next to major label tracks when it finally hits those playlists.
Got Questions About Making Trap Beats?
When you’re just starting out, it’s easy to get bogged down by the same few questions. Let’s be real, we’ve all been there. Getting a handle on these early on will save you a ton of headaches and get you focused on what actually moves the needle: making fire beats.
One of the biggest things new producers stress about is sound selection. Do you really need to drop a grand on plugins to sound pro? Nope, and that’s one of the biggest myths in the game.
What Are the Best VSTs for Trap Melodies?
It’s true, a lot of the big names lean on third-party VSTs. You’ll see plugins like Serum all over the place for its insane sound design capabilities, and Omnisphere is a legend for its massive library of dark, atmospheric sounds that are perfect for trap.
But here’s the secret they don’t always tell you: it’s not about having hundreds of plugins. It’s about knowing one or two inside and out. You can absolutely cook up professional, placement-ready melodies using just the stock plugins in FL Studio like Sytrus and FLEX once you get a feel for sound selection and the basics of synthesis. Don’t let your wallet hold your creativity hostage.
How Do I Keep My Mix From Sounding Muddy?
Ah, the dreaded muddy mix. If your beat sounds like it’s covered in a wet blanket, the culprit is almost always the low-mid frequency range, usually somewhere between 200-500 Hz. This is the zone where the body of your synths, pads, and even the low end of your snare can start a street fight with the fundamental notes of your 808.
The fix? Get aggressive with your EQ. Seriously, high-pass everything that isn’t your kick or 808. Just grab an EQ and roll off the unnecessary low-end from your melodies, hi-hats, and percussion. This one move carves out a clean, defined space for your bass to hit hard, instantly making your whole mix feel tighter and more professional.
Here’s another pro tip: try not to have your kick and 808 hit at the exact same moment. If they have to overlap, use sidechain compression. Set it up so the 808’s volume ducks for just a millisecond when the kick hits. This lets the initial punch of the kick slice through the mix, keeping everything clean and powerful.
Should I Use Loops or Make Everything From Scratch?
There’s no wrong answer here. The only thing that matters is what helps you finish a dope beat the fastest. Plenty of professional, chart-topping producers use loops to get ideas flowing or just to speed up their workflow. It’s not cheating—it’s working smart.
Royalty-free melody loops and MIDI files are incredible tools. MIDI packs, in particular, are a fantastic middle ground. They give you professionally written melodies and chord progressions that you can then tweak and assign to your own unique sounds. You get the best of both worlds: a great starting point and total creative control.
Ready to take your sound to the next level? FL Studio Sound Packs has a massive library of royalty-free drum kits, 808s, and MIDI files designed to give your beats that professional edge right out of the box. Download everything you need to start making hits today at https://www.flstudiosoundpacks.com.