How to Make House Music A Practical Guide for FL Studio
Making a great house track really just boils down to a few key ingredients: a solid four-on-the-floor beat, a bassline that gets people moving, some soulful chords, and an arrangement that builds and releases tension. It all kicks off by setting your tempo somewhere in that classic 120-128 BPM sweet spot and laying down a simple but punchy drum pattern in FL Studio.
Your Blueprint for Modern House Music in FL Studio
Think of this as your creative roadmap for cooking up a complete house track from scratch, right inside FL Studio. We’re going to skip the overly technical stuff and focus on a practical workflow you can actually use, project after project.
We’ll start where all good house tracks do: the groove. First, we’ll build that iconic four-on-the-floor beat using some pro-quality sounds from FL Studio Sound Packs. From there, I’ll walk you through carving out an infectious bassline, writing chords and melodies that stick, and then arranging all those ideas into a full song that keeps the energy high and the dancefloor packed.
The main goal here is to give you a repeatable process for turning that initial 8-bar loop into a finished, polished track. We’ll nail down the essential techniques that really define the genre so you have a rock-solid foundation to build on.
The Evolution of House Production
House music has come a long way from its underground Chicago club roots in the early ’80s. It’s now a central force in today’s $12.9 billion global electronic music industry. The first house records were hammered out on drum machines and samplers that cost a fortune, but today, most of the tracks climbing the Beatport charts are made with affordable DAWs like FL Studio and killer sample packs.
With independent labels now grabbing over 30% of global label revenues, the barrier to entry has never been lower. You can dive deeper into the industry’s growth in the latest IMS Business Report.
Before we jump in, let’s get a quick overview of the essential components we’re about to build.
The Core Elements of a House Track
Here is a quick overview of the essential components we will build in this guide.
| Element | Typical BPM Range | Key Characteristic |
|---|---|---|
| Drums | 120-128 BPM | A steady four-on-the-floor kick drum is the foundation. |
| Bassline | 120-128 BPM | A repetitive, groovy low-end that locks in with the kick. |
| Chords & Synths | 120-128 BPM | Soulful, often sampled-sounding stabs or lush pads. |
| Arrangement | 120-128 BPM | Builds energy through intros, breakdowns, and drops. |
This table lays out our game plan. Each element plays a specific role, and we’ll tackle them one by one to ensure they all work together perfectly.
What You Will Learn in This Guide
This tutorial is all about taking action. Whether you’re just starting out or looking to tighten up your workflow, you’ll walk away with skills you can use immediately. We’ll be covering:
- Groove & Drums: How to get that classic house beat programmed in the Channel Rack.
- Bass & Sidechain: Techniques for a fat low end that gels perfectly with your kick.
- Chords & Melody: Simple ways to write musical phrases that people will remember.
- Arrangement & Structure: How to turn your loop into a full song with smooth, dynamic transitions.
- Mixing & Polishing: The basics of using effects and a few mastering tips to get your track sounding professional.
By focusing on this core workflow, you’ll learn not just how to make a single track, but how to approach every house production with confidence and a clear plan.
This guide breaks the whole process down into manageable chunks. You’ll see exactly how each part connects to the next, from laying down that first kick to exporting the final master. Let’s get started.
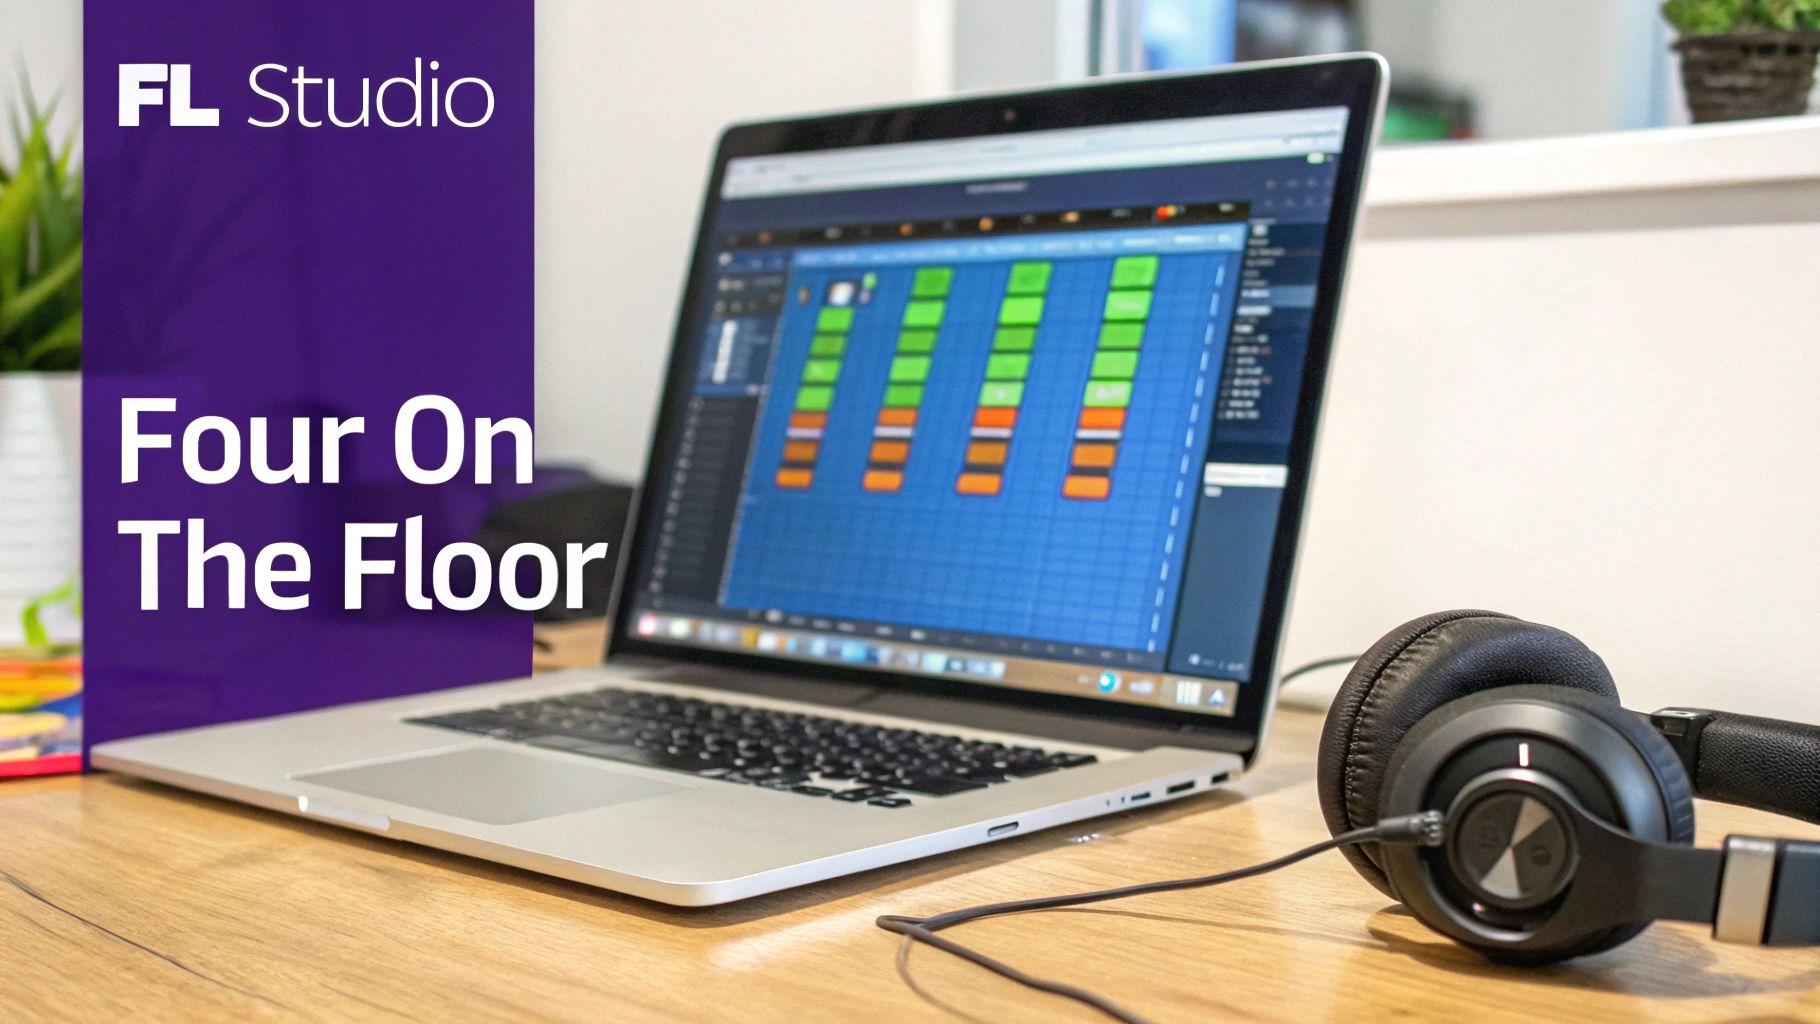
Laying Down the Foundation: Your Four-on-the-Floor Beat
Every great house track starts with an irresistible groove, and that groove is always built on the drums. The iconic four-on-the-floor beat is the absolute heartbeat of house music—a simple but potent pattern that has kept people dancing for decades. We’re going to build that classic rhythm from the ground up, right inside FL Studio’s Channel Rack.
Before you even think about placing a single note, you need to set the stage. House music lives in a specific tempo range that gets heads nodding without feeling too rushed. Set your project’s BPM somewhere between 120 and 128. A tempo like 124 BPM is a fantastic sweet spot for that classic, groovy feel, while pushing it toward 128 BPM will give you a more modern, energetic tech-house vibe.
With the tempo locked in, it’s time to pick your kick drum. This is arguably the most crucial sound in your entire track, so take your time here. You’re searching for a sample with a solid, punchy transient—that initial click—and a tight, controlled low end. Steer clear of kicks that are overly boomy or have a long decay, as they’ll just muddy up your mix later on.
Programming the Kick and Clap
Once your kick sample is loaded into the Channel Rack, programming the four-on-the-floor pattern is as easy as it gets. Just click the buttons for steps 1, 5, 9, and 13. That’s it. You’ve officially created the steady, driving pulse that defines house.
Next, we need the clap or snare to provide that essential backbeat. This sound traditionally lands on beats 2 and 4, creating that classic push-and-pull rhythm against the kick. In the Channel Rack, this means placing your clap on steps 5 and 13.
- Kick: Placed on every beat (1, 5, 9, 13).
- Clap/Snare: Placed on the off-beats (5 and 13).
Listen to the kick and clap playing together. You should immediately feel that foundational house rhythm taking shape. If something feels off, don’t hesitate to swap out samples. Sometimes a clap with a different texture or a kick with a slightly sharper attack makes all the difference.
Adding Hi-Hats for Energy and Groove
Let’s breathe some life into this beat with hi-hats. A super common and effective move is to place a closed hi-hat on every off-beat. In the Channel Rack, that means clicking steps 3, 7, 11, and 15.
This simple pattern fills the gaps and creates a nice, steady pulse. To give it more character, let’s add an open hi-hat. A great starting point is to place it on the last two off-beats of the bar—steps 11 and 15. This simple addition creates a feeling of movement and anticipation, pulling the listener into the next bar.
Pro Tip: Don’t let your drums sound like a machine. Right-click your hi-hat channel and open it in the piano roll. From there, you can manually adjust the velocity (volume) of each hit. Try slightly lowering the velocity on a few of the closed hats to create a more dynamic, human feel.
Bringing Your Beat to Life with Swing and Percussion
A perfectly timed beat can sound rigid and lifeless. The real magic, the secret sauce to an infectious groove, is swing. Up on FL Studio’s main toolbar, you’ll find the swing knob. A little bit goes a very long way here; start by adding just 10-20% of swing. You’ll hear your hi-hats and claps shift just slightly off the grid, creating a subtle but undeniable bounce.
To really flesh out your beat and give it a unique personality, it’s time to layer in some percussion. This is where you can get really creative.
- Shakers & Tambourines: A simple 16th-note shaker pattern or a ready-made loop can add a constant layer of high-frequency energy that just glues everything together.
- Congas & Bongos: Try placing a few conga or bongo hits in the gaps between your main drum elements. This adds a funky, organic texture.
- Rims & Clicks: A subtle rimshot or a quiet woodblock can introduce rhythmic complexity without cluttering up the main beat.
Don’t be afraid to pull in some loops from a good sound pack. Dragging a well-made percussion loop into your project can instantly add a professional layer of groove that’s tough to program from scratch. For a more detailed look at these concepts, check out our guide on making beats with FL Studio, where we explore more advanced patterns.
By thoughtfully blending these core elements—kick, clap, hats, and percussion—and adding just the right amount of swing and velocity changes, you’ll have transformed a simple pattern into a living, breathing foundation for your entire house track.
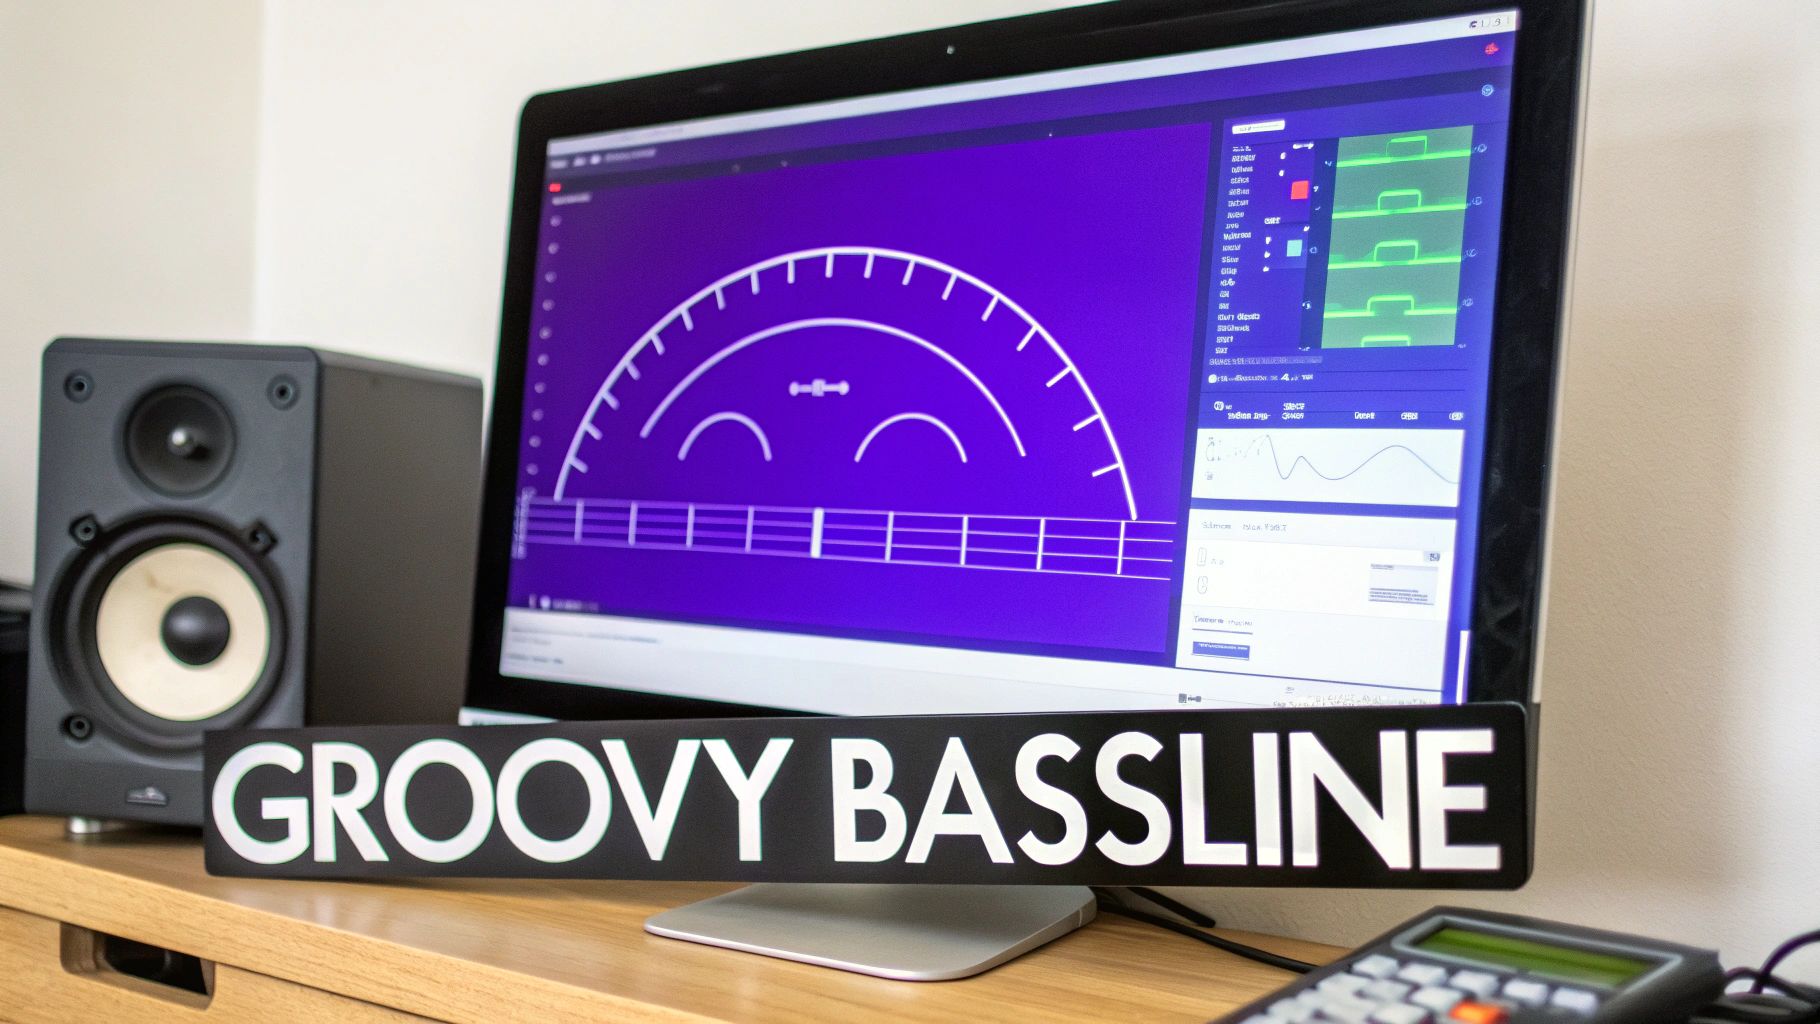
Getting Your Bassline Groovy with Sidechain
Okay, your drums are laying down that solid foundation. Now it’s time for the soul of the track: the bassline. This is what gets heads nodding. A killer bassline isn’t just about filling the low frequencies; it works hand-in-hand with the kick to create that infectious, can’t-sit-still groove.
First up, you need to pick your sound. The character of your bass completely defines the vibe. Are you going for deep and atmospheric, or is this a more upbeat, funky track?
- Sub Bass: For deep house, you can’t go wrong with a clean sine-wave sub. It adds all the weight and warmth you need without getting in the way.
- Synth Bass: A classic square or saw wave is perfect for tech and classic house. Try adding a little filter movement to give it some life.
- Bass Loops: Seriously, don’t sleep on pre-made loops. A real, live-sounding bass guitar loop can inject instant organic energy. You can find tons of these in professional FL Studio sample packs, which is a great way to add a pro touch and save a bunch of time.
Keeping Your Bass Patterns Simple But Effective
You don’t need to be a music theory genius to write a banging bassline. In house, simple is almost always better. The main job here is to lock in tight with the kick drum and hold down the track’s harmony.
A great place to start is just by having the bass hit on the same beats as the kick. Or, to get a bit more syncopation, have it play in the gaps between kicks. If you’ve already figured out a chord progression, just have the bass play the root note of each chord. It’s a dead-simple trick that ensures everything sounds musically connected.
Jump into FL Studio’s Piano Roll and start sketching out a one or two-bar loop. The goal is to get a rhythm that’s hypnotic—something that feels good on repeat.
The Magic Trick: Sidechain Compression
Now for the technique that defines modern house music: sidechain compression. This is the secret sauce for getting a clean, punchy low end where your kick and bass aren’t fighting each other for space. It creates that classic “pumping” sound, where the bass volume ducks down for a split second every time the kick hits.
Learning how to make house music that sounds professional pretty much requires you to master this. Without it, your low end will just be a muddy disaster.
Here’s the simplest way to get it done in FL Studio:
- Set Up the Trigger: Route your kick channel to a free Mixer track. Let’s call it “Sidechain Trigger.” Right-click the send knob at the bottom of the destination track (“Sidechain Trigger”) and choose “Sidechain to this track only.” This is crucial—it sends the signal without sending the actual audio.
- Load the Limiter: On your bassline’s Mixer track, add an instance of the Fruity Limiter.
- Configure It: Inside Fruity Limiter, click over to the ‘COMP‘ mode. Look for the Sidechain input box (bottom right) and select your “Sidechain Trigger” track from the list.
- Dial It In: Now for the fun part. Start pulling down the Threshold and cranking up the Ratio. You’ll immediately hear the bass start to duck. The Release knob is where the real magic happens; it controls how fast the bass volume comes back up. A short release gives you a tight, punchy pump, while a longer one creates a more obvious, breathing effect.
Take your time playing with the Release knob. The goal is to get the pumping effect to feel rhythmically locked in with your track’s tempo. When you get it right, it adds an incredible amount of bounce to the whole groove.
Once you combine a great sound with a simple pattern and nail the sidechain, your bassline will sit perfectly in the mix. It’ll provide that melodic anchor and rhythmic drive that every great house track needs.
Writing Chords and Melodies That Define Your Track
Now that you’ve got the drums and bass locked in and grooving, it’s time to give your track its soul. The chords and melodies are the parts people will hum later; they set the mood, tell the story, and transform a simple beat into a real piece of music. Don’t worry, you don’t need a music degree to write killer harmonic parts for a house track.
A lot of producers just starting to figure out how to make house music get hung up here, convinced they need to be a piano virtuoso. The truth is, modern tools like MIDI files from construction kits are a massive creative shortcut. These packs come loaded with professionally written chord progressions and melodies that you can just drag and drop right into FL Studio’s piano roll.
This approach is fantastic because it gives you a solid, proven foundation to build on. You can instantly pull in a soulful progression and then immediately start tweaking notes, shifting the timing, or swapping out the instrument to make it completely yours. It’s an incredible way to learn what works while getting ideas down fast.
House Chords Made Simple
House music harmony often circles back to a few specific chord types that deliver that signature deep, soulful, or jazzy feel. While music theory is a deep rabbit hole, you can get amazing results by just focusing on a couple of core concepts.
The magic is often in the 7th chords. Unlike a basic major or minor chord, 7th chords add an extra note that gives them a richer, more complex emotional color.
- Minor 7th Chords (m7): These are the absolute backbone of deep and soulful house. They just sound lush, moody, and sophisticated. Think of that classic late-night club vibe.
- Major 7th Chords (maj7): A little brighter and airier, these have a dreamy, almost jazzy feel. They’re perfect when you’re aiming for a more uplifting or chilled-out atmosphere.
A classic, can’t-miss progression in house is the “ii-V-I” (two-five-one). For example, in the key of C Major, that would be Dm7 – G7 – Cmaj7. The best way to get a feel for this is to just start punching these chord types into FL Studio’s Piano Roll and listening to how they sound together.
Honestly, don’t overthink it. Some of the biggest house anthems are built on a simple two-chord loop that just repeats. The real secret is choosing the right sounds and adding tiny variations to keep it from getting stale.
Choosing Your Sounds and Building Layers
The instrument patch you pick is just as crucial as the notes you’re playing. The exact same chord progression can feel completely different when played on a gritty electric piano versus a wide, atmospheric pad.
Start by loading up an instrument on a new Channel Rack track. FL Studio’s own synths, like Sytrus or FLEX, are filled with incredible presets that are perfect for any style of house music.
Here are a few go-to sound choices to get you started:
- Rhodes/Wurlitzer Electric Pianos: These are staples. You’ll hear them all over deep and classic house for their warm, percussive, and slightly raw tone.
- Pads: A soft, sustained pad is perfect for laying down a harmonic bed. It can just sit in the background, filling out the sonic space and adding a sense of atmosphere.
- Synth Stabs: Short, punchy synth chords (often those minor 7ths we talked about) are what you need for creating those rhythmic, funky patterns that really cut through a mix.
Once you’ve got a chord progression you like, start layering sounds to give it more depth. For instance, you could have a Rhodes playing the main chords, while a soft string pad plays the exact same notes but holds them out longer. It’s a simple trick that instantly makes your track sound fuller and more professional. Just copy your MIDI pattern from the Piano Roll to a new instrument channel and start experimenting with different combinations. This is a fundamental step in making your track sound complete.
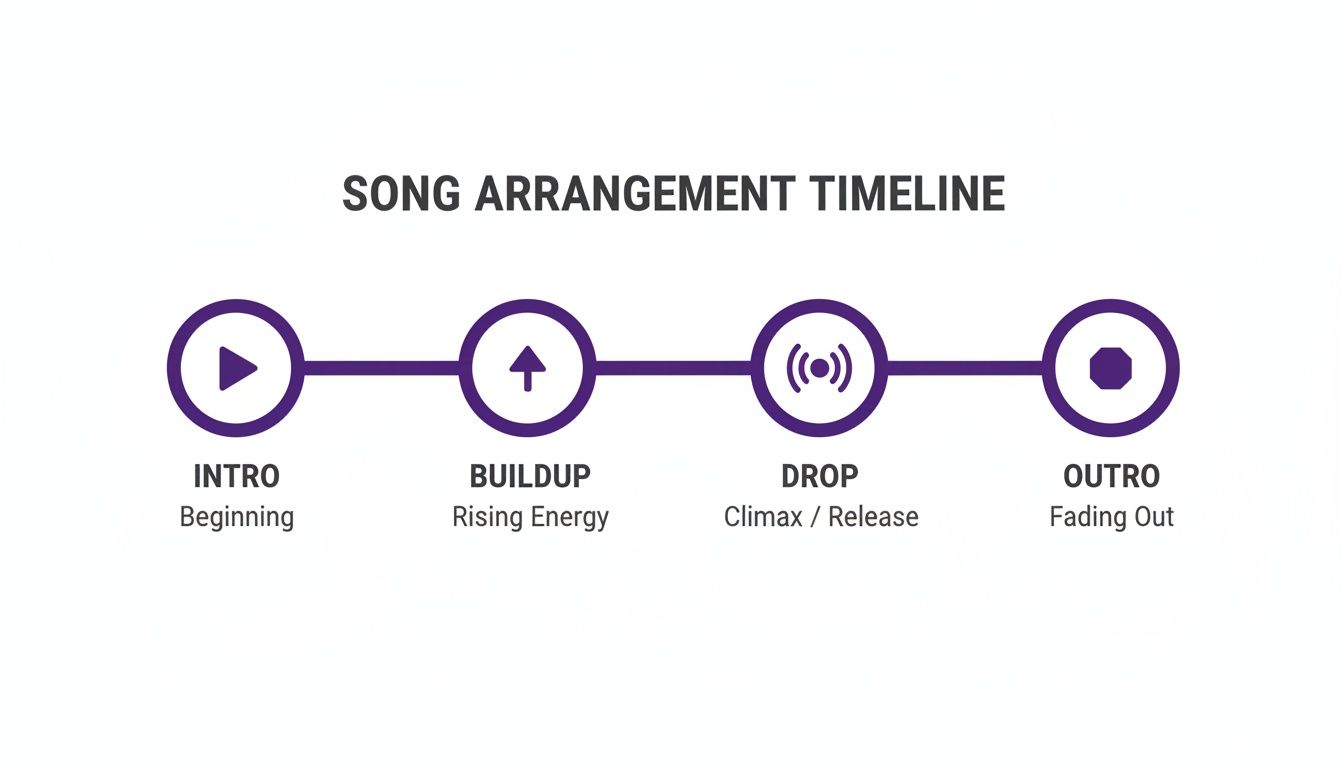
Arranging Your Track from Intro to Outro
Alright, your loop is solid and the core elements are grooving together. Now for the fun part: turning that 8-bar idea into a full-fledged track. This is where you transform a repetitive loop into a dynamic journey that builds tension, creates memorable moments, and keeps people hooked.
We’ll map out a classic house structure right inside FL Studio’s Playlist view. This is your canvas for laying out all your patterns and audio clips to build the song from start to finish.
Building Your Song in the Playlist
Think of the Playlist as your timeline. Every pattern you’ve made—drums, bass, chords—gets painted onto this grid. A really effective workflow is to split your main drum pattern into individual stems. Just render your kick, clap, hats, and percussion as separate audio clips. This gives you surgical control to bring elements in and out, which is the key to building and releasing energy.
Of course, using stems from professional sound packs can be a huge time-saver. For instance, the loops inside Ultimate Dance Loops Vol. 1 are designed to be dropped right into your Playlist, letting you sketch out a complete, professional-sounding arrangement in minutes.
The timeline below breaks down the typical flow of a house track. It’s a proven formula that works.
Remember, a great arrangement isn’t just about what’s playing; it’s about what isn’t. Strategically pulling elements out is just as powerful as bringing them in. This is how you create that stark contrast that makes a drop hit so hard.
The Intro and Buildup
Your intro needs to be two things: inviting and DJ-friendly. Aim for 16 to 32 bars. This is where you set the mood and introduce the core groove. A good starting point is a filtered-down version of your main drum beat—maybe just the kick and a few light percussion hits. Every 8 bars, introduce something new, like your hi-hats or a simple, pulsing bass note.
The buildup is all about winding up the tension right before the release.
- Add a Riser: A simple synth note climbing in pitch or some white noise with the volume slowly creeping up always does the trick.
- Play with Filters: Automate a high-pass filter on your drums to thin them out just before the drop. When the full kick slams back in, it’ll feel massive.
- Use Drum Fills: A quick snare roll or tom fill in the very last bar is a classic way to signal that something big is about to happen.
Pro Tip: Create an automation clip for the master pitch. A tiny, almost unnoticeable rise in pitch over the last 8 bars of a buildup can create an incredible sense of upward momentum without anyone consciously realizing why.
The Drop and the Breakdown
This is it—the moment everyone’s been waiting for. The drop is where your track explodes with peak energy. Unleash everything at once: the full drum kit, the main bassline, your chord progression, and any lead melody you have. The goal here is pure, undeniable groove.
After a run of high-energy, you need to give the dancefloor a chance to breathe. That’s the breakdown. Strip the track down to its melodic or atmospheric soul. Take out the drums and bass completely, leaving just your pads, chords, or a haunting little melody. This emotional reset creates powerful contrast and sets the stage for the second drop, which often feels even bigger than the first.
Keeping It Interesting with Automation
A track without movement is a boring track. Automation is your secret weapon for making your arrangement feel alive and constantly evolving. In FL Studio, you can automate almost anything: volume, filters, reverb, panning—you name it.
Just right-click any knob or slider and select “Create automation clip.” A new lane will pop up in your Playlist where you can literally draw in changes over time.
- Filter Sweeps: Slowly open the cutoff filter on your synth pad over a 16-bar section to make it feel like it’s blooming into the track.
- Reverb Throws: Automate the ‘wet’ knob on your clap’s reverb. Crank it up right at the end of a phrase to create a huge, washed-out transition.
- Panning: Gently automate the panning on a shaker loop so it drifts from left to right, adding subtle stereo movement that listeners feel more than they hear.
It’s these small, evolving details that keep a listener glued to your track from beginning to end. Your outro should be a smooth landing. Just do the reverse of your intro: strip elements away every 8 or 16 bars, leaving just the basic beat and maybe a fading atmospheric sound to close things out.
Frequently Asked Questions About Making House Music
As you start your journey into house music production, you’re bound to hit a few common roadblocks. Everyone does. Getting the right answers can be the difference between finishing that banger and getting stuck on an 8-bar loop for weeks.
Let’s dig into some of the most frequent hurdles producers face in FL Studio and get you some practical, no-nonsense advice to push your tracks forward.
What Are the Best FL Studio Packs for House Music?
To get that authentic house sound, you need the right raw ingredients. It really does start with your sample library. The trick is to find packs that are laser-focused on the specific subgenre you’re making, whether it’s deep, tech, classic, or something else.
For your drums, focus on packs that give you punchy kicks, snappy claps, and those iconic 909-style hi-hats. These aren’t just nice-to-haves; they are the absolute foundation of the genre.
When it comes to the melodic side of things, construction kits are an absolute goldmine. They come packed with MIDI files, synth loops, and basslines that are all engineered to work together right out of the box. Using the MIDI is a huge advantage because it gives you total creative control—you can swap out the synth patch, change the notes, or tweak the rhythm, all while learning how pro-level chord progressions are built. Always take a minute to listen to a pack’s demo to make sure its vibe actually matches the track you have in your head.
How Do I Make My Tracks Sound Less Repetitive?
Okay, let’s be real: house music is built on repetition. That’s what makes it hypnotic. But the secret to keeping it interesting is all about subtle evolution. A track that feels alive is one that’s constantly changing in small ways the listener might not even consciously notice.
The most effective mindset is to think in 8 or 16-bar phrases. At the end of each phrase, make one small change. This keeps the listener hooked and anticipating what’s coming next without ever breaking the groove.
Here are a few ways to pull this off:
- Automation is Your Best Friend: Seriously, use it everywhere. Slowly open up a filter on a synth pad over 16 bars to build energy. Gently add a bit more reverb to your clap as you approach a new section. These tiny dynamic shifts breathe a massive amount of life into a static loop.
- Vary Your Drums: Don’t just let the same drum pattern run for seven minutes straight. Try dropping the kick out on the very last beat of an 8-bar phrase to create a little pocket of tension. Toss in a quick synth fill or a crash cymbal at the end of a section to signal that something new is about to happen.
- Introduce and Remove Elements: Bring in a new percussion loop, like a shaker or tambourine, for just one section to change up the energy. Then take it out again. This additive and subtractive approach is the key to creating a dynamic, professional-sounding arrangement.
Why Do My Mixes Sound Muddy?
Muddiness, especially down in the low-end, is probably the single most common mixing problem for new producers. Nine times out of ten, it’s because your kick drum and bassline are fighting for the same space. When they clash, your whole mix can feel weak and cluttered.
First things first, make sure you’ve properly sidechained your bass to your kick. We covered it earlier, but it’s worth repeating: this is non-negotiable for creating space and letting that kick punch through cleanly.
Next, you have to get friendly with your EQ. Put an equalizer on both your kick and bass channels. A killer technique is to find the fundamental frequency of your kick (it’s usually hanging out somewhere between 50-100Hz). Once you find it, go to your bass EQ and cut a small notch out of that exact same frequency range. This simple move carves out a perfect pocket for each element to live in, side-by-side.
Finally, use high-pass filters aggressively on everything that doesn’t need low-end information. Your hi-hats, pads, vocals, and most percussion have absolutely no business being down in the sub frequencies. Cutting out all that useless rumble from multiple tracks will clean up your mix in a huge way, leaving more headroom for a powerful and defined low end.
Ready to stop searching for sounds and start creating? FL Studio Sound Packs gives you instant access to a massive library of royalty-free loops, drum kits, and MIDI files designed for modern producers. Find the perfect sounds for your next house track and download everything you need with one simple membership.
Explore the full catalog at https://www.flstudiosoundpacks.com