A Digital Audio Workstation for Beginners Guide
So, you’ve decided to make music. Awesome. The first thing you’ll need to get your head around is your new creative command center: the digital audio workstation, or DAW.
What Is a DAW and Why Is It Your New Creative Hub?
Think of a DAW as the entire music studio—the recording booth, the giant mixing console, the racks of effects—all neatly packed into a single piece of software on your computer. It’s the digital space where every single idea, from a simple melody to a complex drum pattern, comes to life and gets molded into a finished song.
Imagine trying to cook a gourmet meal. You’d need a kitchen with countertops for chopping, a stove for cooking, and a place to artfully arrange everything on the plate. A DAW gives you that exact kind of end-to-end workspace, but for sound. It’s where you take all your raw sonic ingredients—a vocal take, a bassline, a synth chord—and bring them all together into a polished track that’s ready for the world to hear.
This software has completely flipped the script for musicians and producers. Not too long ago, making a record meant booking expensive studio time and hiring engineers. Now, anyone with a laptop can produce professional-quality music right from their bedroom. It’s a game-changer that has sparked a massive wave of independent artists.
The Rise of the Home Studio
The home studio revolution isn’t just a trend; the numbers back it up. The global DAW market was valued at USD 3.12 billion and is on track to hit a massive USD 5.88 billion by 2033. What’s driving this? It’s countless home studio creators and independent artists choosing powerful software over pricey studio rentals. You can dig into more of these trends over on IMARC Group.
This shift puts the power directly in your hands. You don’t need a huge budget or a degree in audio engineering to start creating today. Modern DAWs are built to be more user-friendly than ever, and with a little guidance, you can get the hang of the basics surprisingly fast.
A great way to hit the ground running is to start with pre-made sounds. High-quality resources like sound packs give you professionally designed drum loops, melodies, and samples, which is a huge creative boost while you’re still learning the ropes.
For a beginner, a DAW isn’t just another piece of software; it’s your launchpad. It’s the one tool that gives you everything you need to explore your creative instincts without limits, making it the absolute heart of any modern music setup.
Navigating the Core Features of Your First DAW
Firing up a new DAW for the first time can feel like sitting in an airplane cockpit—a sea of buttons, faders, and meters staring back at you. Don’t sweat it. You don’t need to know what every single thing does right away. Instead, let’s zero in on the five essential tools you’ll be using constantly to build your first track.
Think of these features as the absolute foundation of your digital studio. Getting a handle on them is the first real step toward pulling those musical ideas out of your head and turning them into a finished song.
To make things even clearer, here’s a quick-reference table breaking down the essential features you’ll find in any DAW and what they do in plain English.
| DAW Feature | Its Purpose in Your Music | A Simple Analogy |
|---|---|---|
| Tracks | Organizes each instrument or sound into its own dedicated space. | The lanes on a highway, keeping every car (sound) in its place. |
| Piano Roll | A visual grid where you can write and edit melodies and chords for virtual instruments. | Digital sheet music or a paint-by-numbers canvas for your melodies. |
| Audio Editor | Your toolkit for cutting, pasting, and manipulating recorded audio clips. | A pair of digital scissors and tape for sound. |
| The Mixer | The control panel for balancing volume levels and stereo positioning for all your tracks. | The conductor of an orchestra, making sure no one instrument is too loud or too quiet. |
| Plugins (VSTs) | Software add-ons that act as virtual instruments or sound effects (like reverb or delay). | The spice rack for your music—adding flavor, depth, and character. |
This table gives you the bird’s-eye view, but let’s dive a little deeper into how each part actually works when you’re making music.
Tracks: The Lanes on Your Musical Highway
Every project starts with tracks. Just think of them as separate lanes on a highway, where each instrument—drums, bass, vocals, synths—gets its own dedicated space to move. This separation is the key to keeping your project organized and easy to mix later on.
You’ll mainly deal with two types:
- Audio Tracks: These are for sounds you record or import. A singer’s voice, a guitar riff, or a drum loop you dragged in from a sample pack—it all goes here. You’ll see the sound represented as a visual waveform, which is literally a picture of the audio.
- MIDI Tracks: These don’t hold sound at all. They hold data—instructions that tell a virtual instrument what notes to play, for how long, and how loud. It’s like digital sheet music that you can edit note by note with your mouse.
Getting the difference between these two is a game-changer. Audio is a fixed recording, while MIDI is a flexible set of instructions. This is especially powerful when using pre-made patterns; for instance, you can check out some MIDI drum patterns to see how these instructions can build complex rhythms from absolutely nothing.
The Piano Roll and Audio Editor: Your Creative Canvases
The Piano Roll is where MIDI truly comes to life. It’s a visual grid that looks like a piano keyboard flipped on its side, letting you draw in notes, build chords, and map out entire melodies without ever touching a real instrument. It is your ultimate canvas for musical ideas.
For your audio tracks, you have the Audio Editor. This is your go-to toolkit for slicing and dicing recorded sound. Think of it like a precision pair of scissors and tape; you can cut up clips, move them around, create smooth fade-ins and fade-outs, or surgically remove a bit of unwanted noise.
The Mixer and Plugins: Your Creative Control Center
Once you have all your parts arranged, you need to make them play nicely together. That’s a job for the Mixer. The mixer is your command center for balancing the volume of every track, ensuring no single instrument is drowning out another. Each track gets its own channel strip with a volume fader and a pan knob to place the sound anywhere from left to right in your headphones.
Key Takeaway: A good mix is all about balance and separation. The goal is to carve out a specific space for every element in your song so it can be heard clearly, creating a cohesive and professional sound.
Finally, we have Plugins. These are the secret sauce, the creative spice rack for your music. Plugins, often called VSTs (Virtual Studio Technology), are little software add-ons that either create sound (virtual instruments) or process it (effects). They let you add reverb to make a vocal sound like it was recorded in a huge cathedral, apply a slick echo to a guitar solo, or beef up your bass with an EQ. Simply put, plugins add the character, depth, and polish that make a track shine.
How to Choose the Right DAW for You
This is the big question every new producer asks: “What’s the best digital audio workstation for beginners?” But here’s the truth—there’s no single ‘best’ DAW. There’s only the one that’s best for you and your creative style. Instead of getting lost in endless online debates, let’s focus on what will actually help you make music.
The easiest way to decide is to look at three simple things: your budget, how you like to work, and what you might need down the road. Breaking it down this way cuts through the noise and helps you find a tool that feels less like software and more like an extension of your ideas.
Consider Your Budget
DAWs come in all price ranges, from totally free to professional suites that cost hundreds of dollars. Don’t fall into the trap of thinking more expensive automatically means better, especially when you’re starting out.
- Free Options: You can get started right now with zero financial risk. Software like GarageBand (for Mac users) or Cakewalk by BandLab (for PC) are shockingly powerful. They have everything you need to learn the fundamentals of recording, arranging, and mixing.
- Entry-Level Versions: Most of the big names offer a stripped-down, cheaper version of their flagship software, like Ableton Live Intro or FL Studio Fruity Edition. These are perfect for getting a feel for the workflow before you commit to the full price tag.
- Full Professional Suites: Fully paid DAWs like Logic Pro, Ableton Live Suite, or FL Studio’s All Plugins Edition come loaded with massive sound libraries, advanced features, and more built-in effects than you’ll know what to do with at first.
Remember this: you can make a professional-sounding track in any modern DAW, no matter the price. The real investment isn’t money—it’s the time you put into mastering the software you choose.
Match the DAW to Your Workflow
This is probably the most important factor. How do you actually want to make music? Different DAWs are built around different creative processes, and finding one that clicks with your brain makes all the difference.
Think about the kind of music that gets you excited. If you’re all about making beats and electronic tracks, you’ll love a DAW with a great step sequencer and a flexible, loop-based workflow. This is where FL Studio and Ableton Live really shine, which is why they’re favorites among hip-hop and EDM producers.
On the other hand, if your goal is to record live instruments—guitars, vocals, a drum kit—you’ll want a DAW that feels more like a traditional recording studio. Software with a strong linear timeline and powerful audio editing tools will be your best friend. Logic Pro and Pro Tools are industry standards for this kind of work, built from the ground up for recording and mixing.
Plan for Future Compatibility
Finally, give a little thought to your future setup. Make sure the DAW you pick actually runs on your computer (macOS or Windows). You’ll also want to check that it plays nice with any hardware you plan on buying, like a MIDI keyboard or an audio interface.
It’s also crucial to see if it supports third-party plugins (like VST or AU formats). This is huge, because it means you can expand your sound library with new instruments and effects from other companies later on. Honestly, choosing a popular digital audio workstation for beginners almost always guarantees you’ll have great compatibility and a mountain of online tutorials to help you out when you get stuck.
Your First Song: A Simple Step-by-Step Workflow
Alright, theory is one thing, but making music is what it’s all about. Let’s get our hands dirty and walk through a simple, repeatable process that brings all those features we just talked about together. Think of this as a universal road map for creating a song, broken down into three easy stages.
This isn’t just a technical checklist; it’s a creative game plan. By tackling one stage at a time, you keep from getting overwhelmed and can put your energy exactly where it needs to be, whether that’s nailing the groove or getting that final mix just right.
Stage 1: Creation and Arrangement
This is where the magic begins—turning those ideas in your head into actual sound. Think of it like sketching out a drawing. You start with the core elements that will define the whole piece.
A fantastic way to kick things off is to grab a pre-made drum loop from a sound pack and drag it right onto an audio track. Boom. You instantly have a professional-sounding rhythmic foundation to build on.
With the drums grooving, create a new MIDI track and pull up the piano roll. Let’s program a simple bassline. Don’t overthink it; a few repeating notes are all you need to lock in a groove. Finally, add one more MIDI track to record or draw in a simple melody. This initial sketch is your song’s DNA.
Stage 2: Editing and Refining
Okay, you’ve got a basic loop going, but it probably sounds a bit raw. The editing stage is all about cleaning up that raw idea and turning it into something that feels like a real song. It’s like tidying up your workspace before you start the detailed work.
A common first step is to quantize your MIDI parts. This feature snaps all your notes perfectly to the project grid, instantly tightening up the timing and making everything sound more cohesive. From there, you can start building out a basic song structure. Just copy and paste your 8-bar loop to create sections for an intro, a verse, and a chorus. You can create easy variation by simply removing elements, like taking the drums out for the intro.
If you want to dive deeper into how to isolate and work with these different layers, check out our detailed guide on how to use stems in music production.
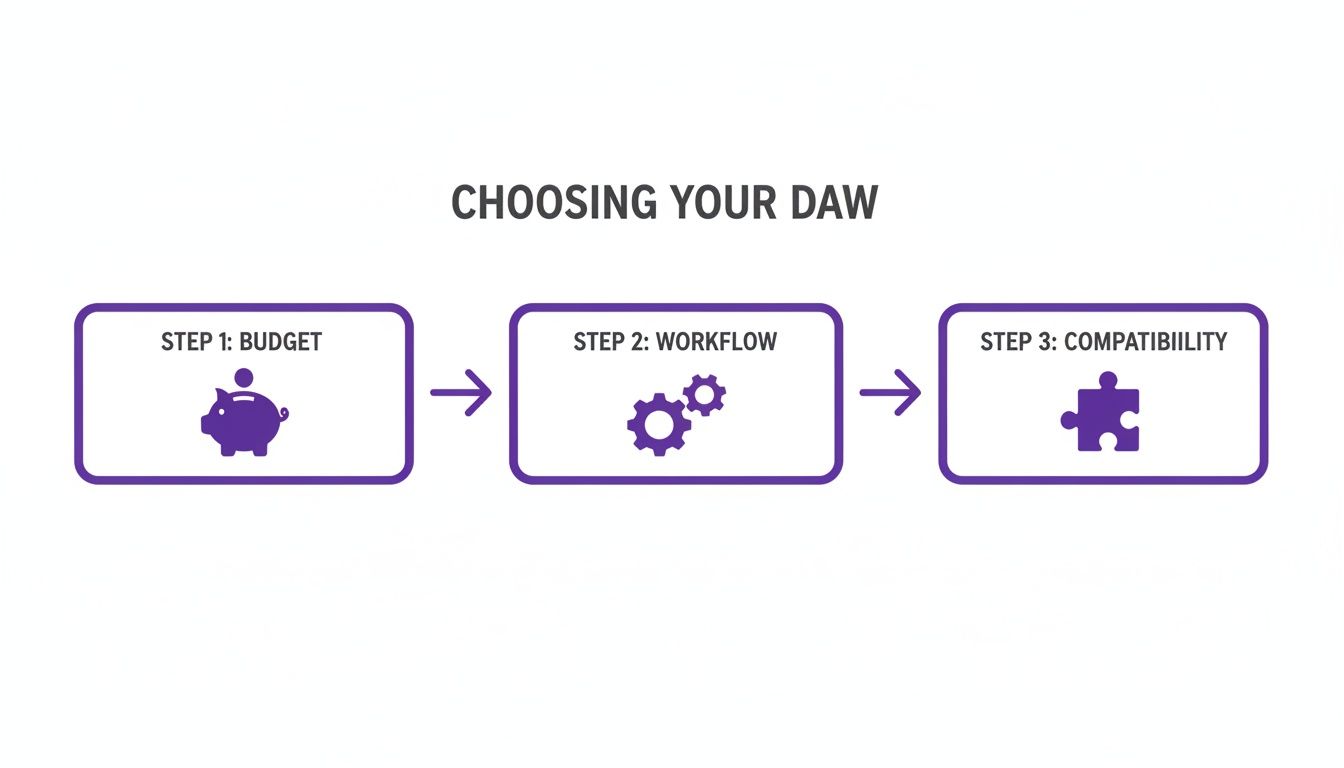
This visual breaks down the key factors—budget, workflow, and compatibility—that will help you pick the right DAW from the start. It’s a reminder that choosing your first digital audio workstation should be a personal decision that fits your specific creative needs and resources.
Stage 3: Mixing and Exporting
The final stretch is all about balance and polish. Open up your DAW’s mixer, where every track in your project has its own channel strip. The goal here is simple: make sure every instrument can be heard clearly without drowning anything else out. Use the volume faders to adjust the levels of your drums, bass, and melody until they sit nicely together.
Next, play around with the pan knobs to give each sound its own space. Try panning your melody slightly to the left and maybe another synth pad to the right. This creates a wider, more immersive sound and helps everything feel less cluttered.
Once you’re happy with the balance, it’s time to share your creation. Find the “Export” option in your DAW’s file menu and choose a format like MP3 or WAV. This will bounce your entire project down to a single audio file that you can upload, email, or just blast in your car.
You’re joining a huge wave of new creators. The individual user market is exploding, growing at an impressive 16% every year, all thanks to software that makes this entire process more accessible than ever. You can read the full research about the DAW market growth on Research Nester.
Using Sound Packs to Accelerate Your Progress
Staring at a blank project in a new DAW can feel… well, a little intimidating. Sound packs are the perfect way to bridge that gap between the ideas in your head and the music you want to make. They aren’t just collections of sounds; they’re powerful, hands-on learning tools that can seriously fast-track your skills.

Think about it. Instead of trying to build a complex drum beat from scratch on day one, you can drag and drop a professional drum loop right into your project. Instantly, you have a solid rhythm to build on. More importantly, you can start to listen, analyze, and understand how a pro-level groove is actually put together. This immediate result keeps you motivated and moving forward.
Sound packs give you the building blocks to learn by doing. By deconstructing professional sounds, you internalize the techniques used to create them, making your own productions better, faster.
Unlock Creative Secrets with Sound Packs
Different types of sound packs offer unique learning opportunities. Each one gives you a different piece of the puzzle, helping you understand how finished tracks are put together.
- Sample Packs & Loops: These give you individual sounds (like a single snare hit) and pre-made phrases (like a 4-bar guitar riff). Working with these is a crash course in rhythm, timing, and how different instruments layer together in a mix. It’s also the perfect way to learn the basics of how to use samples in FL Studio or any other DAW.
- MIDI Packs: Ever wonder how a producer came up with an amazing chord progression? Analyzing the MIDI files in a pack reveals those secrets. You can see the exact notes they used, move them around, and even assign them to your own virtual instruments to create something completely new.
- Construction Kits: These are my personal favorite for beginners. A construction kit is basically a ‘deconstructed song.’ It gives you every individual track (or ‘stem’) from a finished beat—drums, bass, synths, and effects, all separated.
By loading a construction kit into your project, you get to reverse-engineer a professionally produced track, layer by layer. It’s an incredible way to see how a real mix is balanced, arranged, and structured. Best of all, top-tier packs like ‘Platinum Swagg’ use universal .WAV files, meaning they work flawlessly in any DAW you choose.
This approach is a game-changer for the growing wave of independent artists and creators. Market analysis from The Business Research Company shows that indie artists are prime users of software-only DAWs. For them, sample packs with MIDI are gold, allowing them to learn by deconstructing professional beats and applying those lessons to their own music.
Common Mistakes to Avoid on Your Music Journey
Every producer hits a few walls when they’re starting out. It’s just part of the process. But knowing what the most common pitfalls are ahead of time can save you a ton of frustration and help you focus on what actually matters: finishing music.
Getting your head around these early challenges is a huge part of learning a digital audio workstation for beginners.
The “Masterpiece” Trap
One of the biggest hurdles I see new producers face is trying to create a sonic masterpiece on day one. It’s so easy to get lost adding dozens of instrument layers and complex automations, but this almost always leads to a bloated, messy project that you never finish.
Instead of trying to write your magnum opus right away, start small. Really small.
Key Takeaway: Your goal is to finish tracks, not perfect them. Seriously. Finishing a simple 8-bar loop teaches you way more about the entire production workflow than getting stuck on an overly ambitious intro for weeks.
Keep Your Sounds Clean (No Red Lights!)
Another classic beginner move is completely ignoring the volume meters. When a track’s meter starts flashing red, that’s not a good thing. It means the audio signal is “clipping,” which creates a nasty, harsh digital distortion that sounds just plain bad.
Think of it like the “check engine” light for your sound. Luckily, it’s an easy fix with a massive impact on your quality:
- Watch the Master Fader: This is the big one—it controls the volume for your entire song. Keep a close eye on it and make sure it never goes into the red.
- Turn Down Individual Tracks: If your master fader is too hot, the solution isn’t just to pull that one fader down. Go back and lower the volume on your individual instrument tracks. This builds a clean, balanced mix from the ground up.
Don’t Drown Your Mix in Effects
Finally, fight the urge to slap a bunch of effects on everything. It’s tempting, I know. But drowning a perfectly good melody in reverb, delay, and chorus all at once is a surefire way to make your mix sound like a muddy, amateur mess.
Start by really learning one or two essential tools. Get comfortable with a basic EQ to shape your sounds and maybe add a touch of reverb to give an instrument some space. Master the basics first, and you’ll build mixes that sound clear, professional, and intentional.
Got Questions About Getting Started?
Jumping into music production is exciting, but it’s totally normal to have a few questions swirling around. Let’s tackle some of the most common ones that pop up for beginners, so you can feel confident firing up your first project.
Do I Really Need a Ton of Expensive Gear to Start?
Not at all. Honestly, the barrier to entry is lower than ever. All you truly need to get going is a computer you’re comfortable with and a decent pair of headphones. That’s it. You can make complete, professional-sounding tracks with just that setup.
Things like MIDI keyboards, microphones, and audio interfaces are awesome tools that can definitely make your life easier down the road, but they are not required on day one. Your laptop has more than enough power to get you started right now.
What’s the Real Difference Between Free and Paid DAWs?
Think of free DAWs as the perfect training ground. They give you all the essential tools you need to learn the ropes—recording, arranging your ideas, and mixing your tracks together. They’re fantastic for figuring out the fundamentals.
Paid DAWs build on that foundation, usually offering a much bigger library of built-in sounds, more powerful effects plugins, advanced features for power users, and dedicated customer support if you get stuck.
Many of the big-name DAWs offer free trials or light versions, which are a great way to test the waters without spending a dime.
The best sound packs are built to work everywhere. For instance, all of our audio files come in the standard .WAV format, which means you can just drag and drop them into any major DAW—Ableton Live, Logic Pro, Cubase, you name it. The MIDI files are just as universal, giving you total creative freedom no matter what software you end up choosing.
Ready to stop searching and start creating? FL Studio Sound Packs offers a massive library of royalty-free samples, loops, MIDI, and construction kits that work in any DAW. Download your first pack today and hear the difference.