
How to Install VST in FL Studio: A Quick Guide (how to install vst in fl studio)
So, you’ve got a new VST plugin and you’re itching to use it in FL Studio. Getting it from a downloaded file into your project is a rite of passage for every producer, and it’s way easier than you might think.
The whole process really just boils down to two things: putting the plugin file where FL Studio can see it, and then telling FL Studio to look for it.
The Quickest Way to Install VSTs in FL Studio
Moving beyond stock plugins is a huge step. It’s how you start to define your own sound with unique instruments and effects. The key to making it all work smoothly is understanding how FL Studio’s Plugin Manager works.
Think of the Plugin Manager as your command center for everything third-party. Its main job is to scan specific folders on your computer, find all the valid plugins you’ve installed, and then neatly organize them so you can pull them up in any project. Simple as that.
Understanding VST File Locations
Here’s where most people get tripped up: knowing exactly where to put the plugin files. It’s the most common hurdle, but it’s easy to clear once you know the basics.
Plugins generally come in two flavors. You have the classic VST2 format, which on Windows is a single .dll file. Then you have the more modern VST3 format, which uses a .vst3 file extension. Each has its own standard home on your computer.
Most plugin installers will automatically put these files in the right place. But if you have to do it manually, or if you just want to keep things organized, knowing these default paths is a game-changer. FL Studio is already programmed to look in these specific folders first.
If you’re just starting out, my best advice is to stick to these default locations. Don’t create a bunch of random folders all over your hard drive. Keeping everything in the standard directories makes rescanning and troubleshooting so much easier down the road.
This process is pretty universal. A popular YouTube tutorial that blew up a while back showed this exact method. Download the VST, extract the files, and drop them into the right folder. Then, in FL Studio, you just head to ‘Options’ > ‘Manage Plugins’, hit ‘Find installed plugins’, and let it do its thing. Once your new toy shows up, just click the star next to it to add it to your favorites. You can even see producers discussing this on the official Image-Line forums.
To make it crystal clear, here’s a quick-reference table for those default folder paths.
Default VST Plugin Locations for FL Studio
This table lays out the standard installation directories that FL Studio automatically scans on both Windows and macOS. Placing your .dll and .vst3 files here is the most reliable way to ensure they get detected.
| Operating System | VST2 (.dll) Path | VST3 (.vst3) Path |
|---|---|---|
| Windows | C:\Program Files\VSTPlugins |
C:\Program Files\Common Files\VST3 |
| macOS | /Library/Audio/Plug-Ins/VST/ |
/Library/Audio/Plug-Ins/VST3/ |
By keeping your plugins in these locations, you’re creating a clean, organized system that just works. No more hunting for missing files or wondering why a scan didn’t pick something up.
Once you’ve got your new plugins installed and ready to go, the real fun begins. To give them something to chew on, expand your creative toolkit with some new sounds from our collection of royalty-free sample packs and loops.
Navigating the FL Studio Plugin Manager
Alright, so you know where your plugin files live on your computer. The next stop is the FL Studio Plugin Manager, which is basically mission control for your entire VST collection.
Think of it as more than just a simple scanner. It’s a powerful tool for organizing, verifying, and getting all your instruments and effects ready for action. Getting comfortable here is a huge part of learning how to install VSTs in FL Studio the right way.
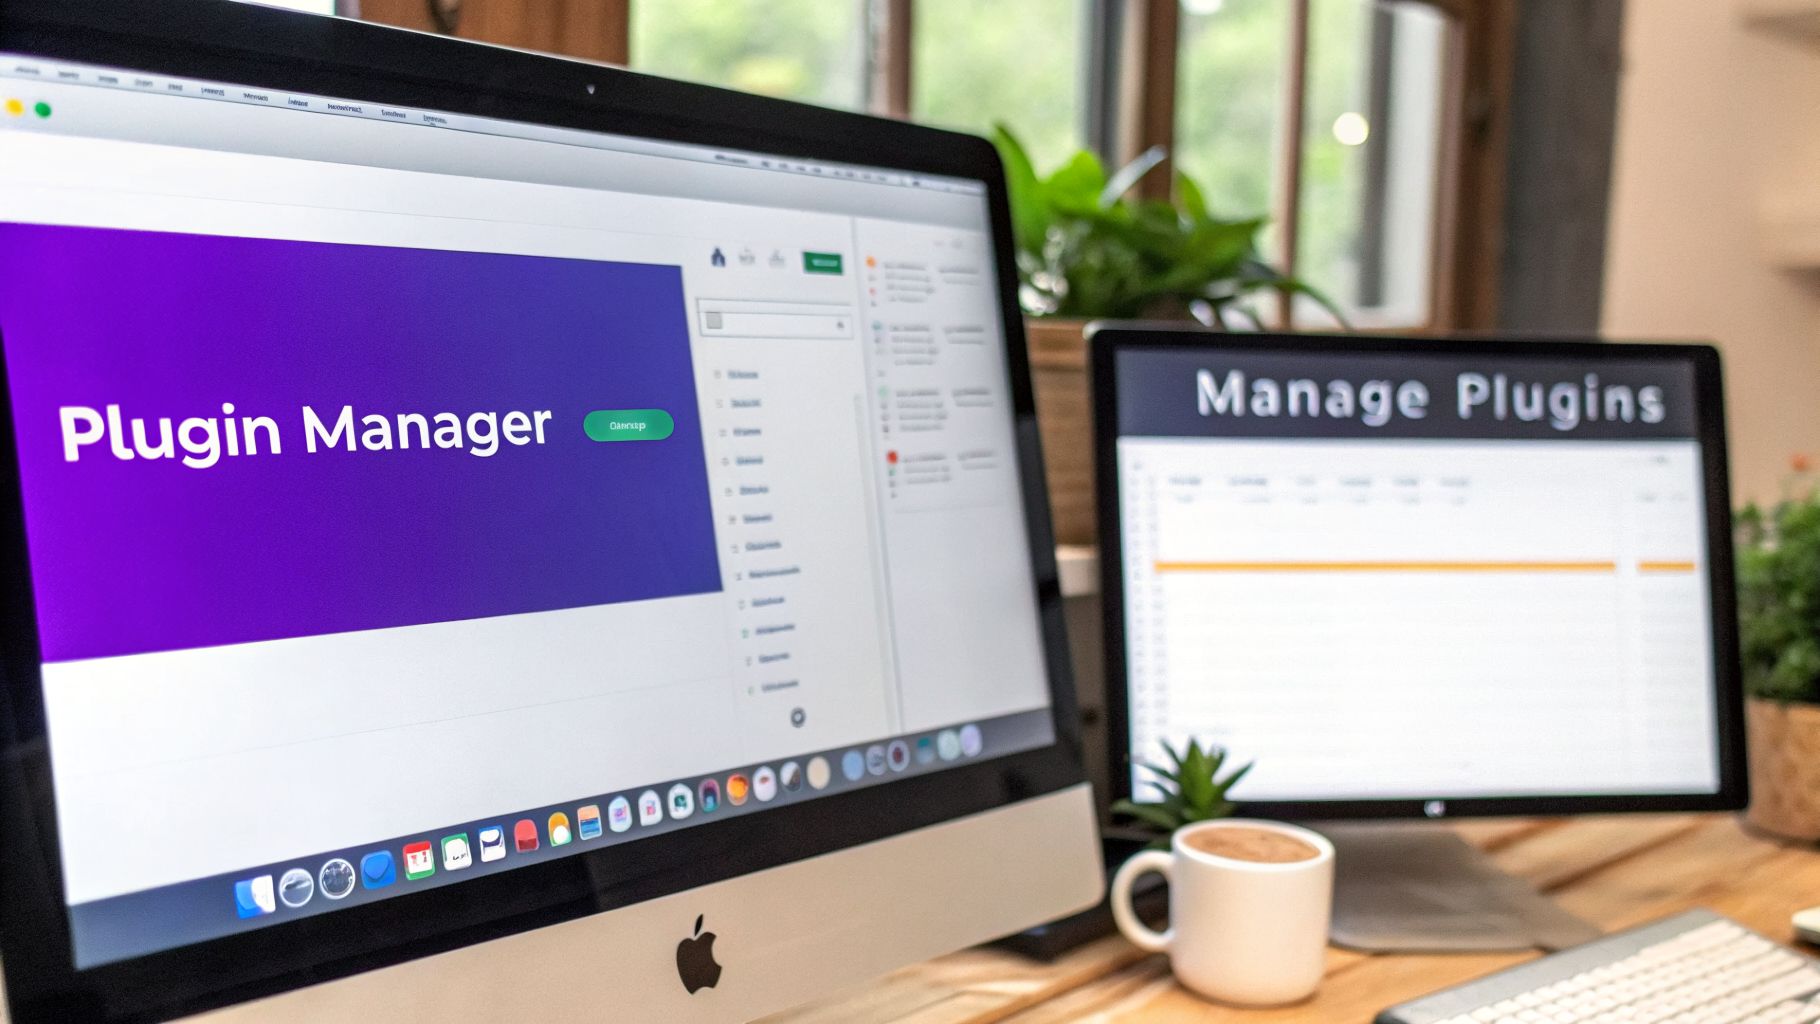
This screen can look a little intimidating at first, but trust me, every button has a purpose. Spending a little time learning it now will save you countless hours of troubleshooting later.
The main event here is starting a scan. At the top of the manager, you’ll see a big, friendly orange button: Find installed plugins. Clicking this tells FL Studio to go on a hunt through all the folders you’ve listed in the ‘Plugin search paths’ window on the left.
Choosing the Right Scan Type
Now, not all scans are the same. The Plugin Manager gives you a few options, and knowing which one to use in different situations will make your life so much easier.
- Fast scan (Rescan previously verified plugins): This is your daily driver. It’s lightning-fast because it only re-checks plugins that FL Studio already knows are good. Use this when you haven’t installed anything new but just want to refresh the list.
- Verify plugins: This is the deep-dive scan. It does a much more thorough check on each plugin file to make sure it’s not corrupted and loads correctly. You absolutely want this enabled the first time you scan for a new plugin. If something fails, it’ll show up in red, telling you right away that there’s a problem.
- Rescan plugins with errors: This one is a real lifesaver. If a plugin failed the verification scan before, this option forces FL Studio to give it another shot. It’s perfect for when you’ve just updated a buggy VST and want to see if the fix worked, without having to rescan your entire library.
A classic mistake is just doing a ‘Fast scan’ after you’ve dropped a new VST into your folder. That scan type often skips brand-new, unverified files. This leads to the all-too-common “I installed it, but it’s not showing up!” problem. Always run a full ‘Find installed plugins’ scan with ‘Verify plugins’ turned on for any new additions.
Once the scan is done, the Plugin Manager gives you a detailed list of everything it found, showing its type (VST, VST3), format (64-bit), and developer. Any new plugins it discovers will be highlighted in bright yellow, so they’re easy to spot.
Favorite Your Plugins for a Faster Workflow
When your new plugin shows up in the list highlighted in yellow, there’s one last crucial step: making it easy to find. Just find your new plugin and click the little star icon right next to its name.
This simple click adds the plugin to your favorites list. Why does this matter? Because that list is what populates the plugin menus in your Channel Rack, Mixer, and Browser. If you skip this, you’ll have to dig through the ‘More plugins…’ menu every single time you want to use it. Favoriting is a key habit for a fast, organized workflow, putting your go-to tools just one click away.
Organizing Your VST Folders with Custom Paths
Let’s be real—while just using the default folders works, your plugin library will eventually turn into a digital junk drawer as you collect more tools. A little organization upfront saves you a massive headache down the line. This is where creating custom VST folder paths becomes a total game-changer for any serious producer.
Instead of just dumping everything into one spot, you can build a structure that actually makes sense. This strategy doesn’t just keep your files tidy; it makes future backups or moving to a new computer a breeze. You’ll always know exactly where everything lives.
Designing a Custom Folder Structure
One of the most effective ways to do this is to organize plugins by what they do. Imagine having separate, clearly labeled folders for all your different tools. It makes finding a specific plugin file for a manual tweak or an uninstall incredibly simple.
You could try a structure like this on your main drive or an external SSD:
- VST_Plugins_64bit (This is your main custom folder)
- Effects (For all your reverbs, delays, EQs, and compressors)
- Instruments (For all your synths, samplers, and virtual instruments)
- Utilities (For meters, analyzers, and other workflow tools)
This categorical approach keeps everything neat. When you install a new synthesizer, you just point its installer to your “Instruments” folder. A new compressor? It goes straight into “Effects.” It’s an intuitive system that scales perfectly as your collection grows.
Pro Tip: It’s a really good idea to keep your VST2 (.dll) and VST3 (.vst3) files in separate parent folders, even inside your custom structure. For instance, have a
My_VST2folder and aMy_VST3folder. Mixing them can sometimes cause scan conflicts or make it hard to know which version of a plugin you’re loading.
Adding Your Custom Paths to FL Studio
Once your folders are set up, you need to tell FL Studio where to look. This step is crucial—otherwise, FL Studio will completely ignore your beautifully organized directories. Thankfully, it’s a straightforward process right inside the Plugin Manager.
- Fire up FL Studio and head to Options > Manage plugins.
- On the left, under the Plugin search paths list, you’ll see a small folder icon with a plus sign. Click it.
- A file browser window will pop up. Just navigate to and select the custom folder you created (e.g.,
C:\My VSTs\Instruments). - Do this for each custom folder you want FL Studio to scan.
After adding your paths, hit the big Find installed plugins button to run a full scan. FL Studio will now search its default locations and your new custom folders, picking up everything you’ve installed. This method is super effective; for most people, FL Studio’s default scan finds 98% of 64-bit plugins on its own, and adding custom paths closes that final gap. You can learn more about the best VST plugins and their installation on revolution935.com.
Troubleshooting Common VST Installation Problems
Every producer has been there. You find an exciting new plugin, run the installer, fire up FL Studio, hit scan, and… crickets. Nothing. A VST that refuses to show up or, even worse, makes your session unstable can completely kill the creative vibe. But don’t sweat it—most of these headaches are surprisingly common and usually have a simple fix.
When a plugin goes missing after a scan, it’s almost always one of three culprits: it’s in a folder FL Studio doesn’t know about, it’s the wrong “bit” version (like a 32-bit plugin in a 64-bit DAW), or it simply failed the verification scan. Your first move should always be a deep scan with the “Verify plugins” option checked. If it shows up in red, you know FL Studio sees it but can’t load it for some reason.
This little troubleshooting dance has become a rite of passage for FL Studio users. The classic fix is a ritual we all know: download the plugin, drop the .dll file into the right VST folder, then head to Options > Manage Plugins > Find Plugins for a fresh scan. For a look at this classic workflow, you can find countless discussions from seasoned FL Studio producers on YouTube walking through the exact same steps.
This flowchart breaks down the thought process for organizing your VST folders, which is the best way to prevent these issues from happening in the first place.
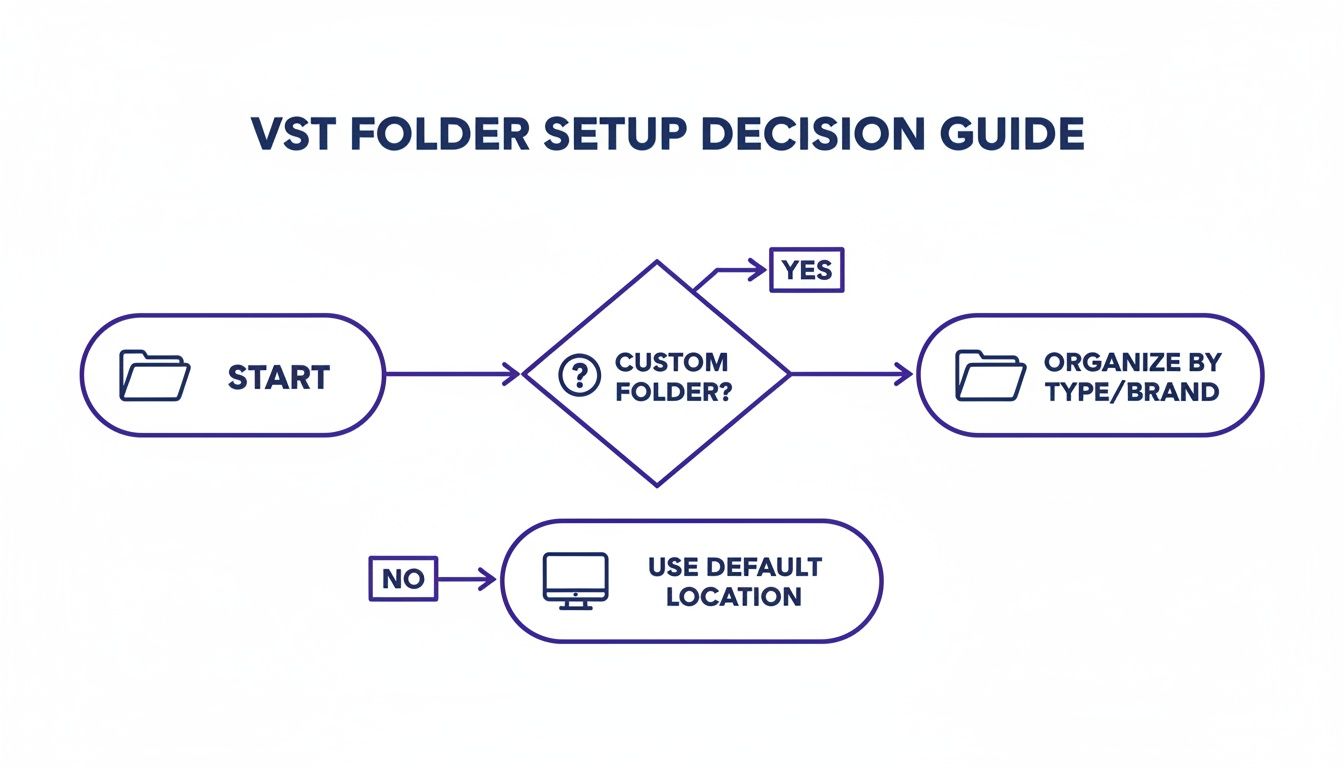
As you can see, the first big decision is whether to stick with FL Studio’s default folders or create your own custom setup for better long-term organization.
Solving Mismatched Plugin Versions
One of the most frequent hangups, especially with older or free plugins, is the 32-bit versus 64-bit problem. Modern versions of FL Studio are 64-bit and expect 64-bit plugins. If you try to load a 32-bit VST, it either won’t show up or might cause strange glitches.
Luckily, FL Studio has a clever built-in fix called bridging. The bridge essentially runs the 32-bit plugin in its own separate memory space, allowing it to talk to the main 64-bit application without conflicts.
Here’s how to turn it on:
- Open the Plugin Manager.
- Find your problematic 32-bit plugin in the list.
- Click the gear icon next to its name to open the wrapper settings.
- Go to the ‘Troubleshooting’ tab.
- Just check the box for “Make bridged”.
Give it a quick rescan, and that old 32-bit gem should now load up just fine in your modern, 64-bit project.
Using the Wrapper to Isolate Problematic Plugins
What if a plugin loads but acts up? Maybe it crackles, freezes your DAW, or crashes FL Studio entirely. This is where the plugin wrapper becomes your best friend for damage control. That same “Make bridged” setting is the perfect tool for this, too.
By running a buggy or unstable plugin in a bridged process, you’re building a firewall around it. If that plugin crashes, only its separate “bridged” process will die—not your entire FL Studio session. This one setting can be the difference between losing a few seconds of work and losing your whole project file.
This technique is a lifesaver for managing experimental or legacy VSTs that haven’t been updated in years. It gives you the freedom to use powerful older tools without gambling with the stability of your whole session. Think of it as putting a misbehaving plugin in its own little sandbox where it can’t break any of your other toys.
Building a Clean and Efficient VST Workflow
Getting a VST installed is just the first hurdle. The real magic happens when you build a smart, efficient workflow around your plugins—that’s what shaves hours off your production time and keeps you in a creative flow. An organized library isn’t just for looks; it’s about making sure you spend your time actually making music, not hunting for the right tool.
One of the best habits you can build is mastering the “favorite” system right inside the Plugin Manager. By starring your go-to synths, EQs, and compressors, you’re creating a personalized toolbox that’s always a single click away in both the Channel Rack and the Mixer. This simple trick eliminates the friction of digging through endless menus when inspiration strikes.
VST2 vs VST3 Performance
You’ve probably noticed that many plugins come in both VST2 and VST3 flavors. While either version will get the job done, opting for VST3 is almost always the smarter move for your computer’s performance.
The reason is simple: VST3 plugins are designed to use CPU power only when audio is actually running through them. A VST2 plugin, on the other hand, is always “on,” constantly sipping a little bit of CPU just because it’s loaded into your project. In a massive session with dozens of tracks, that small difference really adds up, freeing up precious processing power for when you truly need it.
My Personal Tip: I keep a dedicated “VST Test” folder on my hard drive and add it to FL Studio’s scan paths. Anytime I download a new freebie or a trial plugin, it gets installed there first. This gives me a sandbox to test for stability and see if I actually like it before committing it to my main VST library. It’s a great way to keep your primary plugin folders clean and bulletproof.
Managing Plugin Updates and Removals
Keeping your tools current is key for stability, but it pays to be careful. When you’re updating a plugin, it’s best to install the new version directly over the old one without moving it. This ensures that any old projects that rely on that VST can still find it and load everything up perfectly.
And what about those plugins you just don’t use anymore? Getting rid of them is just as important for keeping things tidy.
To uninstall a VST without causing future headaches, follow these steps:
- First, delete the main plugin file (
.dllfor VST2 or.vst3) from its folder. - Next, run your computer’s official uninstaller for that plugin to clean up any leftover files and registry entries.
- Finally, pop open FL Studio’s Plugin Manager and run a full “Find installed plugins” scan to refresh the database and remove it from the list for good.
This methodical approach prevents a cluttered library and avoids potential conflicts down the road. A clean VST workflow is deeply connected to how you manage all your production assets. For more on that, check out our guide on how to use samples in FL Studio, which dives into similar organization principles.
Common Questions About Installing FL Studio VSTs
As you start building your VST collection, you’re bound to run into a few head-scratchers. Don’t sweat it—every producer has been there. We’ve pulled together some of the most frequent questions from forums and our own experiences to give you clear, no-nonsense answers.
What Is the Difference Between VST2 and VST3 Plugins?
At a glance, VST2 and VST3 plugins look the same in your browser, but there’s a crucial difference under the hood that directly impacts your CPU. The biggest win for the newer VST3 format is its smart CPU usage. A VST3 plugin only draws processing power when audio is actually running through it.
On the other hand, the older VST2 format is always “on,” sipping a little CPU power just by being loaded into a channel. In a small project, you probably won’t even notice. But once you’re juggling dozens of plugins, using VST3s can be the difference between a smooth session and a nightmare of audio crackles and dropouts.
VST3 also offers more advanced audio routing possibilities. While FL Studio handles both formats without breaking a sweat, if the installer gives you an option, always go for the VST3 version. It’s the modern standard for a reason.
Why Is My VST Plugin Not Showing Up After Scanning?
This is, without a doubt, the most common frustration. You just installed a cool new synth, you hit scan, and… nothing. Before you get too annoyed, run through this quick mental checklist. It solves the problem 99% of the time.
- Wrong Folder: Did you actually put the plugin file (
.dllfor VST2 or.vst3for VST3) in one of the folders FL Studio is set to scan? Double-check your plugin search paths in the Plugin Manager. - 32-bit vs. 64-bit Mix-up: Modern FL Studio is a 64-bit application. If you accidentally installed a 32-bit version of a plugin, it likely won’t show up. Most installers let you choose, so make sure you picked the 64-bit option.
- Scan Verification Failed: Sometimes, a plugin fails the scan silently. In the Plugin Manager, try running a full scan again, but this time make sure “Verify plugins” is checked. This forces a deeper analysis and will often flag the troublesome plugin in red, letting you know there’s an issue.
When in doubt, a fresh, deep scan is your best friend. It’s amazing how many “missing plugin” mysteries are solved by just forcing FL Studio to take another look at your folders.
Can I Move My VST Plugins to an External Hard Drive?
Absolutely. In fact, it’s a great strategy, especially if you’re working on a laptop with a smaller internal SSD. Keeping your main drive free for your OS and projects is key to a snappy system.
The process is simple. Just create a new, organized VST folder on your external drive, move your plugin files over, and then add that new folder’s location to the “Plugin search paths” list inside the FL Studio Plugin Manager.
Once you’ve added the new path, just run a full “Find installed plugins” scan. As long as the external drive is plugged in when you launch FL Studio, your plugins will load and work just like they were on your main drive. For more quick fixes and producer tips, check out our in-depth FL Studio FAQ.
At FL Studio Sound Packs, we want your setup process to be as fast and painless as possible so you can get back to making music. Once your plugins are ready, explore our massive library of royalty-free loops, drum kits, and MIDI packs to give them something incredible to work with. Find your sound at https://www.flstudiosoundpacks.com.